Users
1. Overview
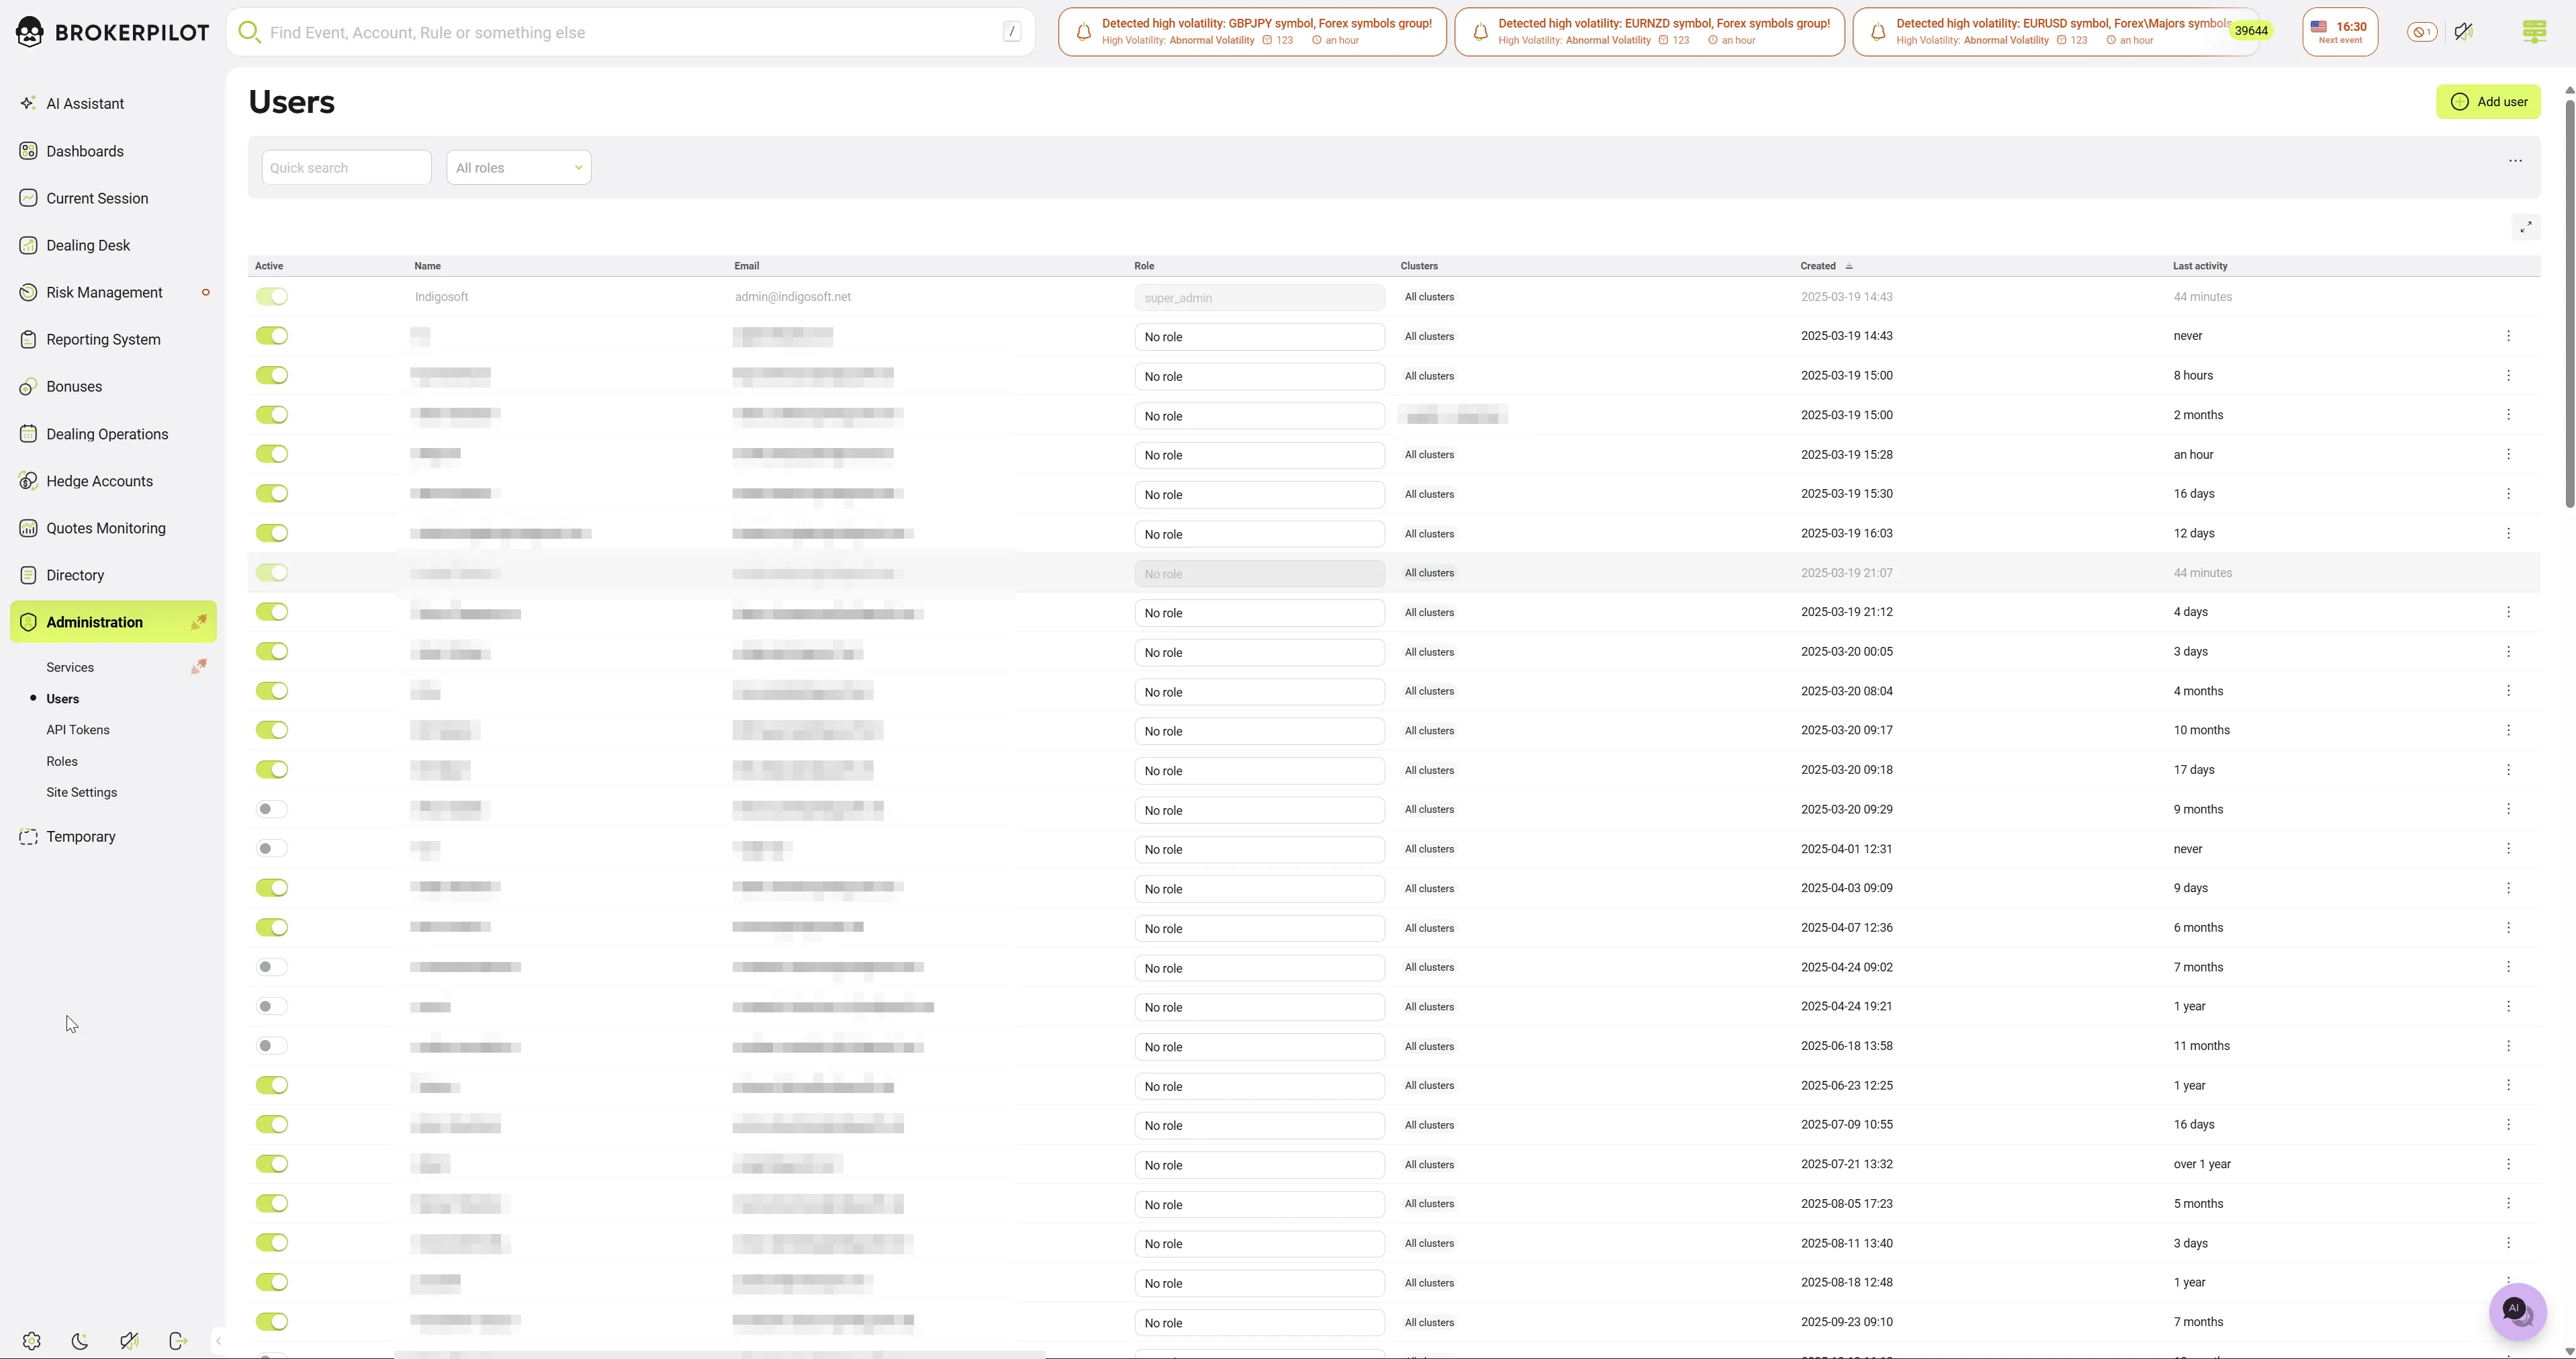
The Users page lists everyone who can sign in to Brokerpilot. Administrators use it to:
- Invite new users by email.
- Turn a user's access on or off (block or unblock).
- Reset a user's password.
- Remove a user permanently.
- Assign a role or set individual permissions.
- Limit which servers or clusters a user can see.
- Set an expiration date for an account.
How to open it: In the side menu, go to Administration → Users. The ? icon next to the page title opens the help article.
Changes made on this page are not saved straight away. They wait until the administrator clicks Save changes in the bar at the bottom of the page, or Undo changes to discard them. The user details panel has its own independent Save changes button.
2. The Users Table
2.1 Filters and Controls
- Search: Matches text in the user's email or name. Case is ignored.
- Role filter: Shows only users who have the selected role.
- Filter templates: Applies saved filter combinations.
- Full-screen switch: Expands the table to fit the screen.
- Note: API tokens (service users) are not listed here. They are managed under Administration → API Tokens.
2.2 Table Columns
- Active: An on/off toggle. "On" means the user is not blocked and their account has not expired. Toggling this waits for you to click Save changes.
- Name & Email: The user's basic details. Non-regular users show "—" for the email.
- Role: A drop-down listing available roles. A user who already has a protected role (e.g., super_admin) will still see it as their current value. Changing this waits for Save changes.
- Clusters: Chips displaying the clusters the user can access.
- Created: The date and time the account was created (
yyyy-MM-dd HH:mm). By default, the table is sorted by this column (oldest first). - Last activity: Shows a relative time (e.g., "5 minutes ago") and refreshes every 10 seconds. Shows Never if the user has not signed in yet.
- ⋮ (Row actions): Opens a menu for resetting passwords, blocking, or removing the user.
Row Highlighting:
- Your own row is marked as the current user.
- Rows with unsaved changes or an open details panel are highlighted.
- Locked rows are dimmed (e.g., your own row and users with protected roles like super_admin). The Active toggle, Role drop-down, and actions menu are disabled on these rows.
2.3 Row Actions Menu (⋮)
- Reset password: (Regular users only). A confirmation dialog appears. Once confirmed, the system signs the user out of all sessions, generates a random password, and emails them a password-reset link.
- Block / Unblock: Functions identically to the Active toggle. The change waits for Save changes.
- Remove: Permanently deletes the user after a confirmation prompt. (Cannot be used on yourself or the built-in AI user).
2.4 Unsaved Changes Bar
When you modify the Active status or Role in the table, a bar appears at the bottom of the page indicating how many users have been changed.
- Save changes: Applies the changes for every affected user, saving them one by one. If one user fails to save, an error appears for them, but the rest are still saved.
- Undo changes: Discards the modifications made in the table.
If you attempt to leave the page with unsaved changes, an Unsaved changes warning dialog will prompt you to either keep editing or discard your changes.
(Special case: If you toggle "Active" on for an expired user, their expiration date is automatically cleared so they don't expire again immediately).
3. Adding a User (Invitation)
- Click the Add user button in the top right.
- In the New user dialog, fill in:
- Name: Required.
- Email: Required (must be a valid email format).
- Expiry date: Optional (
yyyy-mm-dd). Past dates cannot be selected.
- Click Send invite.
What happens next: The system creates the account, and the user receives an invitation email with a password setup link (valid for 24 hours). The list reloads, and the new user's details panel opens automatically so you can immediately configure their role, permissions, and server access.
4. User Details Panel
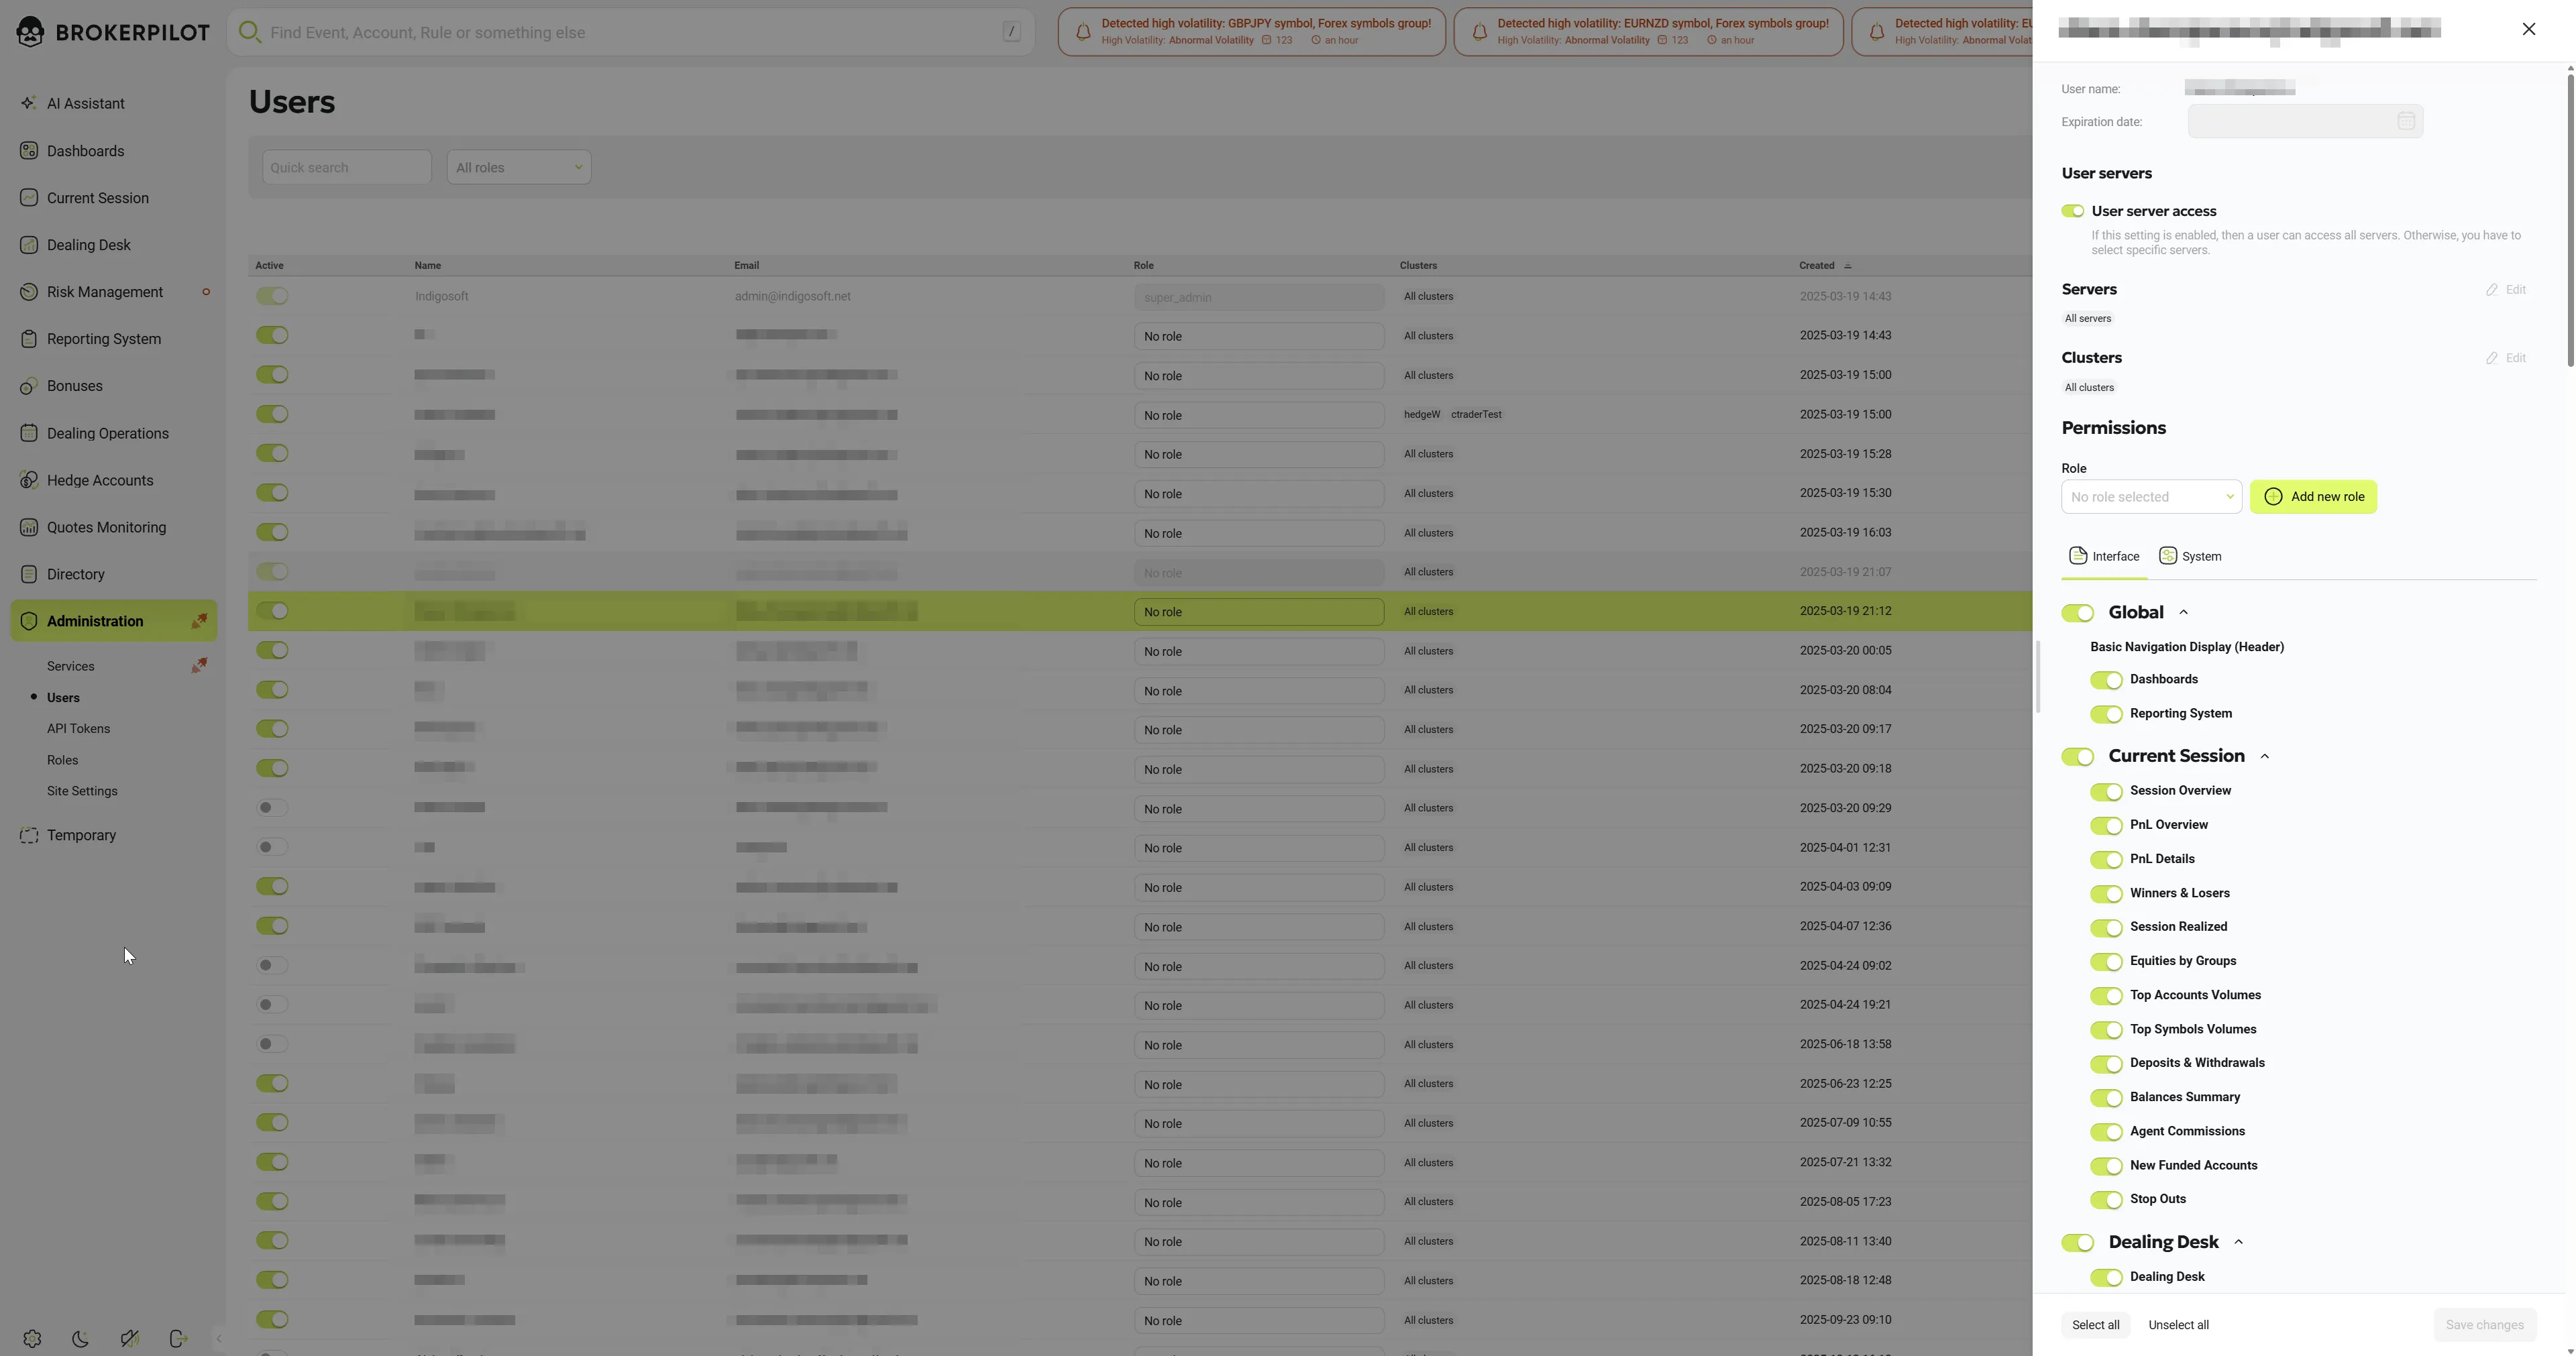
Clicking anywhere on a user's row opens their details panel on the right side of the screen. Its title is the user's email address.
4.1 Basic Details
- Expiration date: Can only be edited by admin or super_admin. Selecting or clearing a date waits for Save changes.
- (For service users, this section shows the Service name and Registration date instead).
4.2 Server & Cluster Access
- User server access switch: If enabled, the user can access All servers and All clusters.
- Servers / Clusters Edit: If the switch is disabled, you can manually select specific servers or clusters for the user to access.
- Note: You can choose specific servers or specific clusters, but not both. Saving a list in one category automatically clears the other.
4.3 Roles and Permissions
- Role drop-down: Select a pre-configured role.
- Add new role: Available when no role is selected. You can manually check permissions and save them as a new, reusable role.
- Permissions interaction: When a user is assigned a role, the checkboxes reflect that role's permissions. If you manually change a checkbox, the role is unlinked automatically because the permissions no longer match the template.
- super_admin users: Permissions for this role are strictly read-only and cannot be altered.
5. Account Expiration
- If an expiration date is set, the user receives warning emails 3 days before and on the day their account expires.
- Once the date passes, a background process marks the account as expired and terminates all active sessions. The "Active" toggle will switch to "off".
- Removing the date or reactivating the user via the table clears the expired state.
6. System Limitations
- You cannot block, remove, or modify the expiration date, servers, or clusters of your own account through these screens.
- You can only modify your own permissions if the new permission set still includes the ability to Administrate Users Permissions.
- Roles that are protected (like super_admin) cannot be assigned or removed from users who already hold them.
- Every change made in this section is synchronized and pushed to all other administrators' screens in real-time.