API Tokens
Brokerpilot# Brokerpilot— Administration → API Tokens
1. Overview
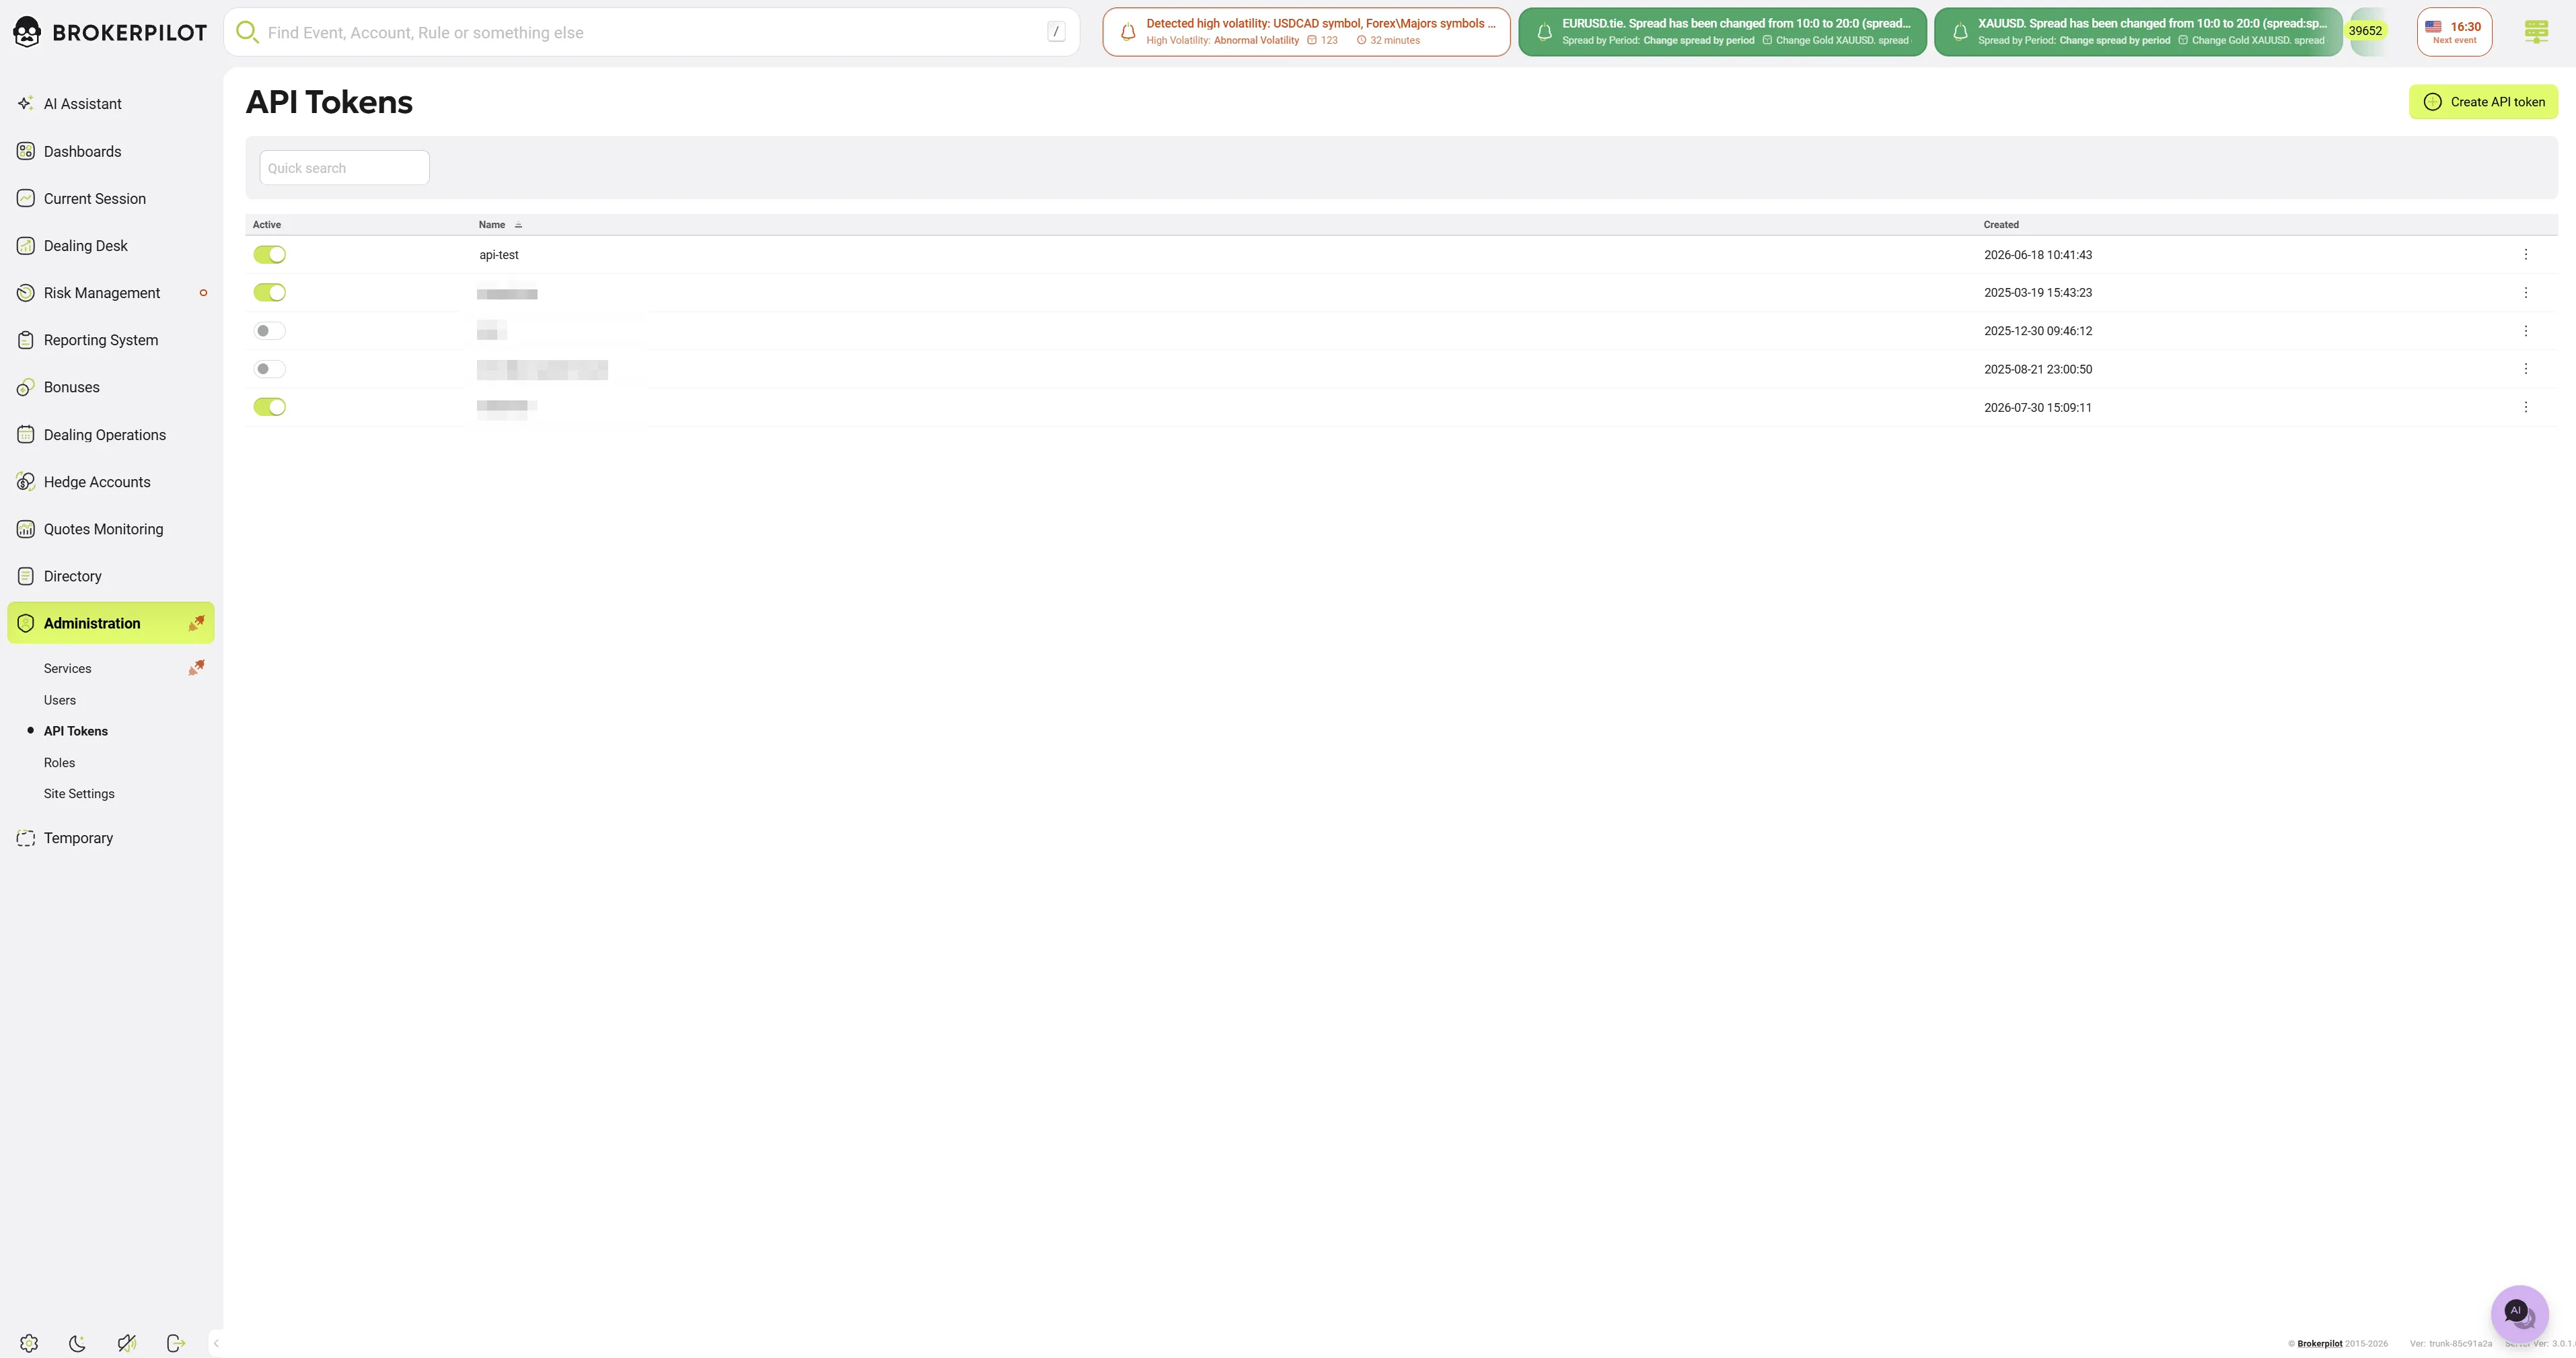
API Tokens is a section of the Brokerpilot Administration menu. In this section, administrators create and manage the credentials that external systems (CRMs, reporting tools, scripts, plugins, integrations) use to call the BrokerpilotAPI without a human user signing in.
Each API token represents a service account. A token:
- has a service name, for example
CRM Integration; - can be active or blocked;
- has its own list of allowed API requests and event channels (the requests map). A token can only call the requests that are enabled in this map. The permissions and roles of regular users do not apply to tokens.
Typical lifecycle:
- An administrator creates a token for a service and copies the generated secret. The secret is shown only once.
- The administrator enables the API requests that the service needs.
- The external service uses the token to open an API session and send requests.
- If needed, the administrator later resets the token (issues a new secret), blocks it temporarily, changes its allowed requests, or removes it.
Navigation: Main menu → Administration → API Tokens.
3. Page layout
3.1 Header
- Page title: API Tokens.
- Create API token button. Only users with Manage API Tokens see it.
3.2 Filter
- A search field that filters tokens by name. The search is case-insensitive, matches any part of the name, and runs 300 ms after the user stops typing.
3.3 Token list (table)
| Column | Description |
|---|---|
| Active | A toggle. On means the token is active, off means it is blocked. Only users with Manage API Tokens can change it. |
| Name | The service name. By default, the list is sorted alphabetically by this column (case-insensitive). |
| Created | Date and time when the token was created. |
| ⋮ (actions menu) | Shown only with Manage API Tokens. Contains Reset token, Block or Unblock (depending on the current state), and Remove. |
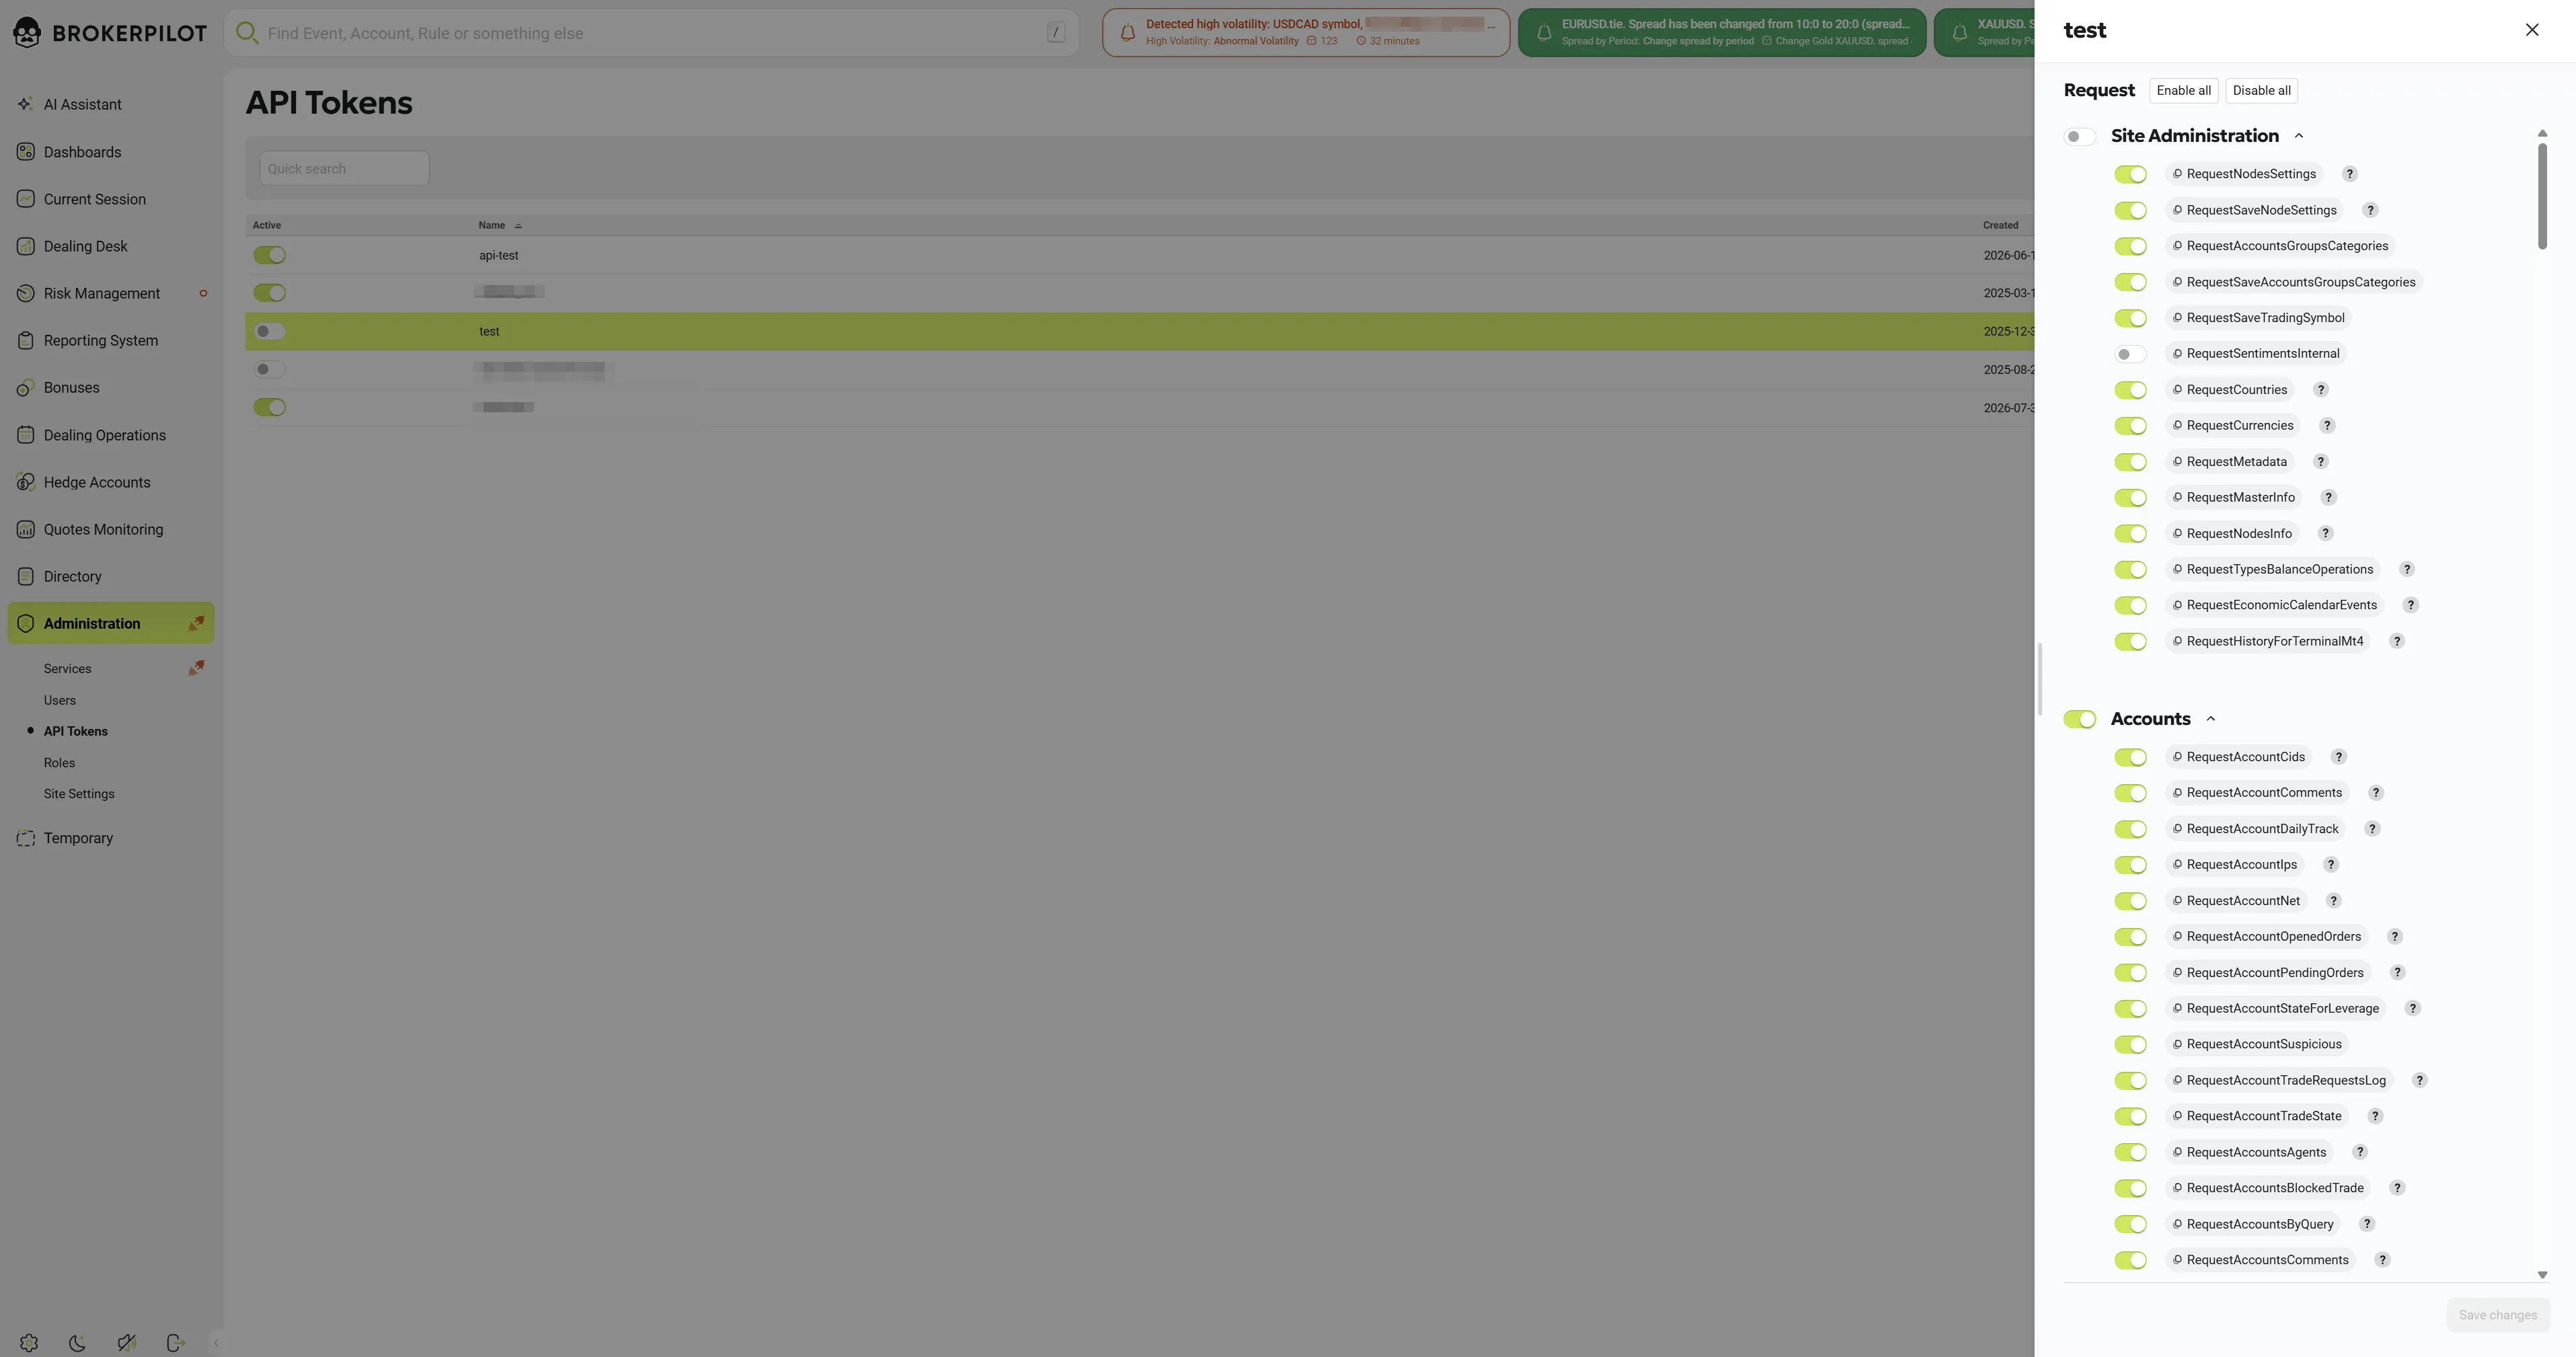
Clicking a row opens the token details panel on the right (see 4.2). The open row is highlighted. Clicking the toggle or the menu does not open the panel.
The list updates in real time. If another administrator creates, changes, blocks, or removes a token, the list refreshes automatically.
4. Operations
4.1 Create an API token
Requires: Manage API Tokens.
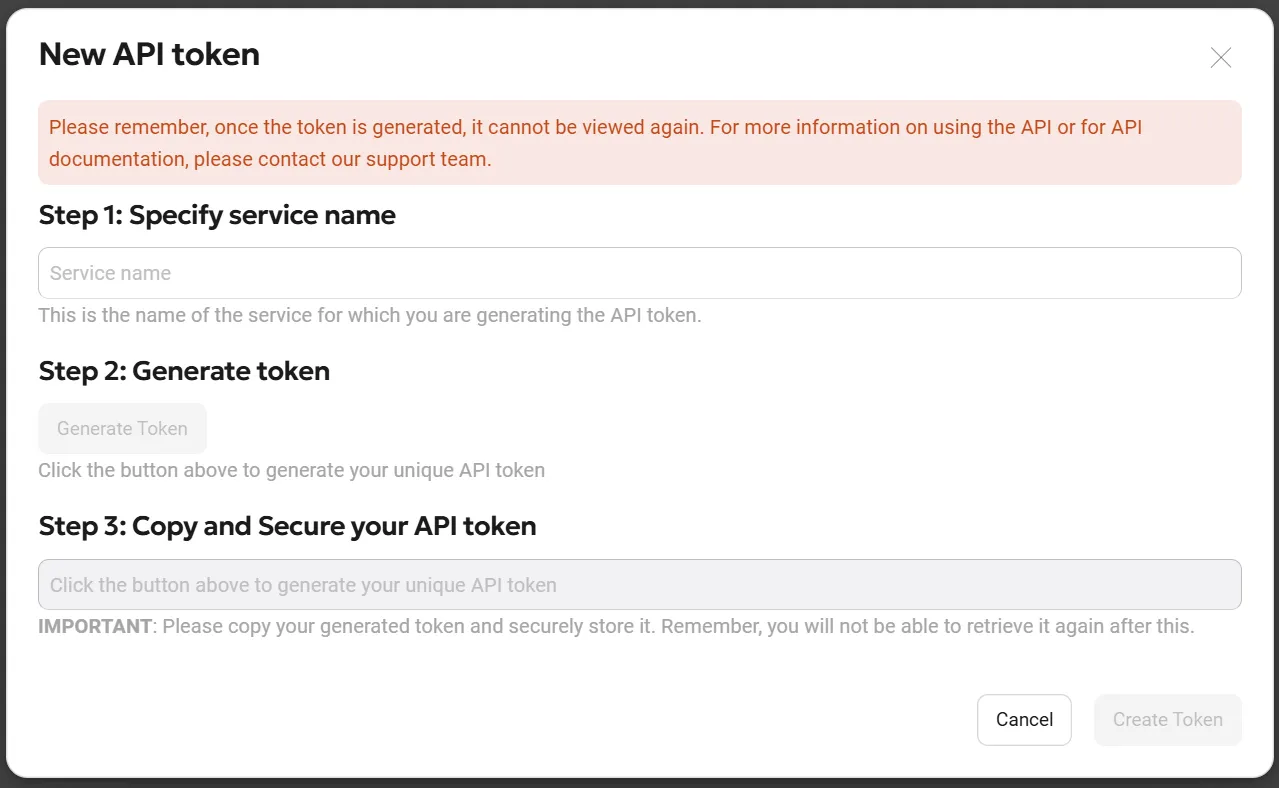
- Click Create API token. The New API token dialog opens with the warning: "Please remember, once the token is generated, it cannot be viewed again."
- Step 1: Specify service name. Enter the name of the service that will use the token.
- The name must contain at least one Latin letter or digit. The system builds a technical identifier from it: lower-case, with every character except
a–zand0–9removed. For example,CRM Integration #1becomescrmintegration1.
- The name must contain at least one Latin letter or digit. The system builds a technical identifier from it: lower-case, with every character except
- Step 2: Generate token. Click Generate token. The secret is generated in the browser.
- If you change the name after generating the token, the generated token is discarded and you need to generate it again.
- Step 3: Copy and secure your API token. Copy the token from the read-only field (clicking the field selects the whole value). "IMPORTANT: Please copy your generated token and securely store it. Remember, you will not be able to retrieve it again after this."
- Click Create token.
Result:
- A notification is shown: "API token has been created. Enable the requests it is allowed to send."
- The token appears in the list, and its details panel opens automatically so you can configure its requests.
- A new token is active. It has access to all servers/clusters.
- A new token starts with almost no allowed requests. By default, only the requests marked enabled by default in the catalog are allowed: 9 Markout and VaR analytics requests (see Appendix A, General group). All other requests must be enabled explicitly.
Possible errors: "Token and name shouldn't be empty!", "Wrong token!", "Wrong name!", "Access denied", "Something went wrong!". The server also rejects a name whose technical identifier is already used by another account.
4.2 View and edit allowed requests (token details panel)
Click a token row to open the panel. The panel title is the token name. The Request section contains:
- Enable all / Disable all buttons. They switch every request that is visible in the panel.
- Groups of requests (see Appendix A). For each group:
- a group toggle. It is on when every request in the group is enabled. Switching it enables or disables the whole group.
- a collapse/expand arrow;
- a list of requests. Each request has:
- a toggle that allows or forbids the request;
- a chip with the request name. Clicking it copies the name to the clipboard;
- a "?" link to the public API documentation at
docs.brokerpilot.net/apidocs/..., when such a page exists.
- Save changes button. It becomes available only after you make a change and only for users with Manage API Tokens.
Behaviour:
- Only the differences are saved: which requests you enabled and which you disabled. If two administrators edit the same token at the same time, they do not overwrite each other's changes.
- If you try to close the panel or leave the page with unsaved changes, a discard changes? confirmation appears.
- On success the notification "API token settings have been saved" is shown.
- If you disable at least one request, all active API sessions of the token are terminated immediately. The service must sign in again. Enabling requests does not terminate sessions.
4.3 Block / Unblock
You can block or unblock a token in two ways: with the Active toggle in the list, or with Block / Unblock in the row menu.
- Blocking terminates all active sessions of the token immediately. While the token is blocked, every API request and event subscription made with it is rejected, and it cannot sign in.
- Unblocking restores access with the same secret and the same request settings.
4.4 Reset token
Use a reset when a secret has been leaked or lost.
- Choose ⋮ → Reset token. The API Token Reset Form opens: "This form is for resetting your existing API token… once the token is reset, the previous one cannot be retrieved."
- The service name is shown read-only.
- Step 1: Reset Token. Click Generate token.
- Step 2: Copy and Secure Your New API Token. Copy the new value.
- Click Reset.
Result: the old secret stops working, all active sessions of the token are terminated, and the notification "API token has been reset" is shown. The token's name, status, and allowed requests stay the same.
4.5 Remove token
Choose ⋮ → Remove and confirm in the Confirm Remove API Token dialog. The service account is deleted permanently, and the token can no longer be used. The deletion cannot be undone.
5. Using a token from an external service
5.1 Authentication
-
Open a session. Send a request to the service authentication endpoint and pass the token in the
Authorizationheader:POST /api/auth/service
Authorization: Bearer <API_TOKEN>Response:
{ "session_token": "s:<session-id>.<signature>" } -
Call the API with the session. Pass the session token in the
Authorizationheader:GET /api/request?request={"RequestName":"RequestTradingSymbols", ...}
Authorization: Bearer <session_token>The same session can also be used for real-time (Socket.IO) requests, subscriptions, and event channels.
5.2 Access check for every call
| Situation | Result |
|---|---|
| Request is enabled for the token | Executed |
| Request is not enabled, or is not in the API token catalog | HTTP 403 (REST), or ResponseAccessDenied / "Access Denied" (real time) |
| Token is blocked | Rejected (HTTP 401/403) |
Event channel (TickChannel, OrderChannel, …) is not enabled | Subscription is ignored |
For an allowed request, the token gets full data access within that request. Regular user permissions are not checked for tokens.
5.3 Token format (for reference)
API_TOKEN = base64url( <service-id> + ":" + <64 random bytes> ), without padding.
The server stores the secret only as a hash, the same way as a password. This is why the secret cannot be shown again after it is created or reset.
6. Important notes and limitations
- The secret is shown once. If it is lost, the only option is Reset token.
- New tokens are restricted by default. Enable the requests the integration needs right after you create the token.
- Disabling requests, blocking, and resetting terminate the token's live sessions. The integration must authenticate again.
- New requests are closed for existing tokens. When developers add a new request to the catalog, it is disabled for every existing token until an administrator enables it.
- Legacy tokens. Tokens created before the requests map existed received a map with the requests they could already send (migration #130). If a token has no map at all, it is still authorised by its old role and permission rules. Once it is saved on this page, the map applies.
- Server/cluster access. The data model and the server API support restricting a token to specific clusters. New tokens get all clusters. The current UI has no control for this setting, although the permission description mentions "access to servers".
- Default Markout requests and the feature flag. The default Markout/VaR requests are granted when a token is created even if the Markout feature flag is off. In that case they are not visible in the panel.