Account Tagging System
Feature Overview
The tagging system provides a flexible tool for categorizing, monitoring, and managing user accounts.
Key features and limitations of the current version:
-
Number of tags: The system offers 16 unique color markers. Only one tag can be created per color (resulting in a maximum of 16 unique tags in the system).

-
Account linking: You can assign any number of tags to a single account, up to all 16 simultaneously.
-
Access rights: Currently, permissions are not restricted. Any user with access to the interface can create, edit, and assign tags.
Account entity: the entity is presented across all system tables. The Login column integrates A/B/C Book badges, account colors, and tags. Hovering over an account displays a tooltip with comprehensive additional information.

The account entity element breaks down into the following components:
The account element breaks down into the following components:
-
Platform Indicator: On the far left, there is an icon displaying the trading platform code (e.g., MQ for MetaQuotes, CT for cTrader). The color of this icon corresponds to the color assigned within the trading platform. If no specific color is designated, it defaults to a neutral grey.
-
Book Type: The next icon indicates the execution style (Book). The colors for these icons are strictly defined: an A (A-Book) is red, a B (B-Book) is green, and a C (C-Book) is purple.
-
Conditional Icons (left of the account number):
- Mini Account Icon: Represented by a lowercase 'm' (styled similarly to the book icon), this appears if the account is designated as a mini account.
- Exception Icon: Represented by a scissors symbol, this indicates that a specific exception condition is applied to the account.
-
Account Number & Entity Tooltip: The account number is the primary element, indicated by an underline. It is clickable: clicking on the number redirects you to the comprehensive Account Information Page. Additionally, hovering the cursor over the entire account entity (not just the account number) triggers a tooltip popup displaying key account metrics (such as Account group, Equity, Realized/Unrealized PnL, etc.).
-
Tags: To the right of the account number, up to three tags are displayed in the order they were assigned. If there are additional tags, an indicator shows the remaining quantity (e.g., +3).
-
Copy to Clipboard: At the end of the element block, there is an icon that allows you to quickly copy the full account number to your system clipboard.
Where is tag management available?
You can interact with tags in two main sections of the system:
-
In the notification processing window (e.g., when a Latency Arbitrage alert is triggered).
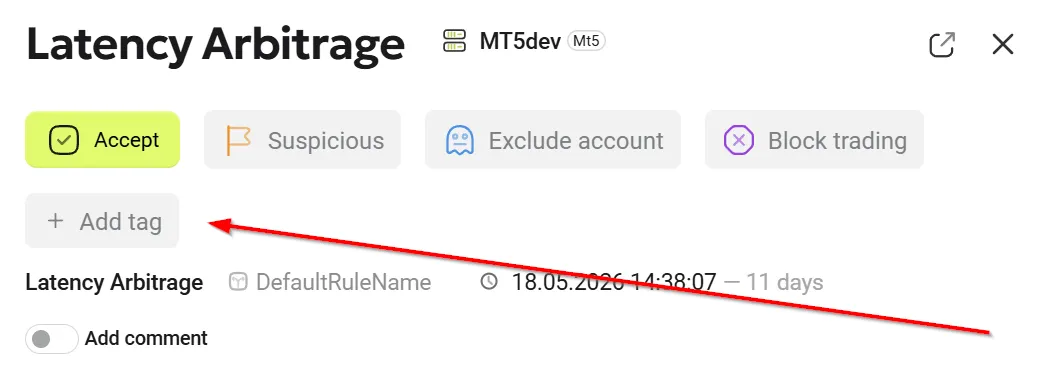
-
On the Account Information page under the account owner's name.
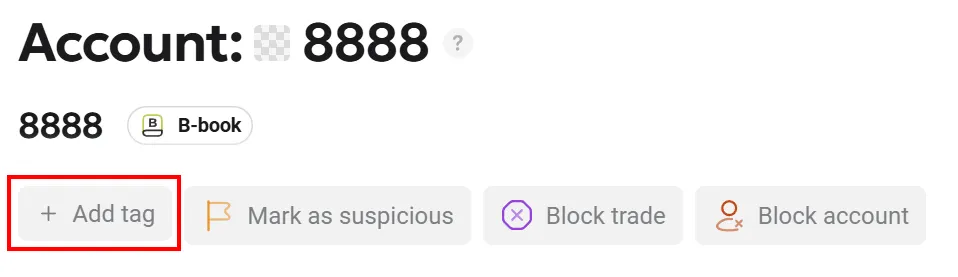
User Guide
1. How to create a new tag
You can create a tag directly while working with an account or a notification:
- Click the
+ Add tagbutton. - In the opened dropdown list, click the
+ New tagbutton at the very bottom. - The Create modal window will appear:
- Enter the tag name in the Name field.
- Select a tag color from the 16 available options (remember that only one tag can be created per color). Below, in the Preview section, you will see how the finished marker will look.
- Click the green
Createbutton to save.
2. How to assign a tag to an account
-
While on the account card or in the notification window, click the
+ Add tagbutton. -
In the list that appears (or using the
Search tags...search bar), check the boxes next to the desired tags. -
The selected tags will immediately appear in the account information page.
3. How to remove a tag from an account (Unlink)
If an account no longer meets the criteria, the marker can be easily removed:
- Method 1: On the account card, find the assigned tag under the client's name. Click the cross icon
(×)inside the tag itself. It will be immediately unlinked from this account. - Method 2: Click the
+ Add tagbutton and uncheck the box next to the required tag in the dropdown list.
4. Editing a tag
You can change the name or color of an existing tag:
-
Open the tag management menu by clicking
+ Add tag.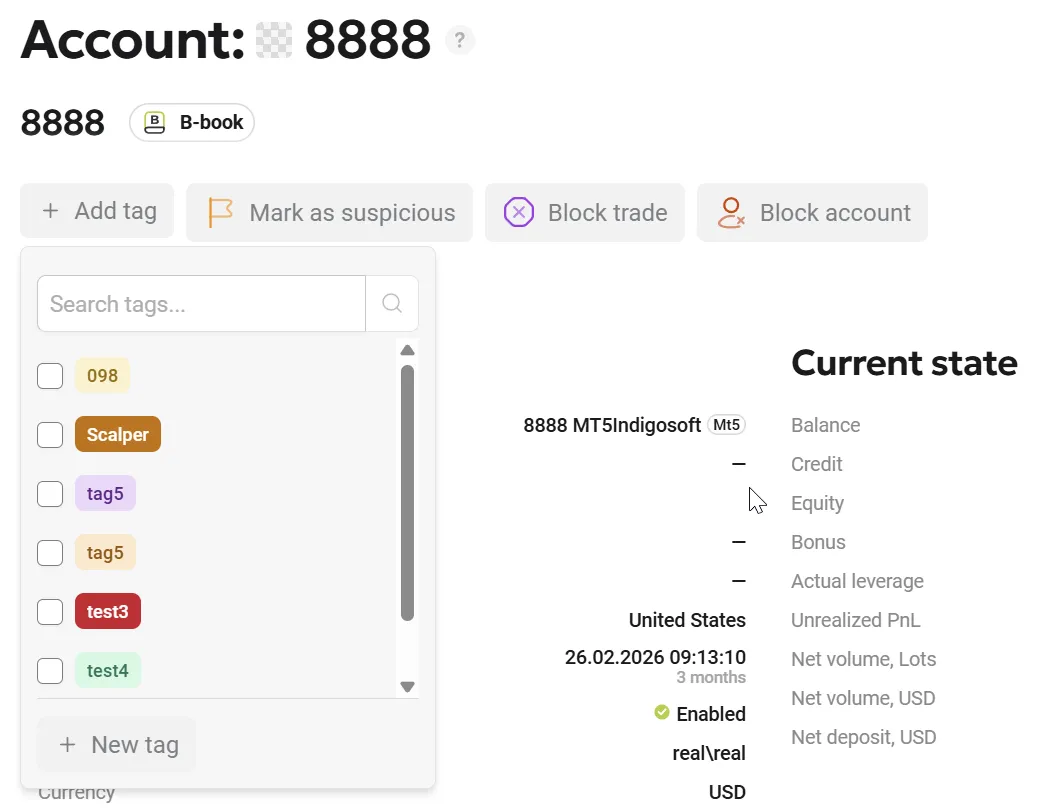
-
Hover your cursor over the desired tag in the list — a pencil icon will appear to its right. Click on it.
-
The Edit window will open:
- To modify the tag: enter a new name or select a different available color, then click the green
Updatebutton.

- To modify the tag: enter a new name or select a different available color, then click the green
5. Searching and filtering tagged accounts
Go to the main menu section: Risk Management -> Tags.
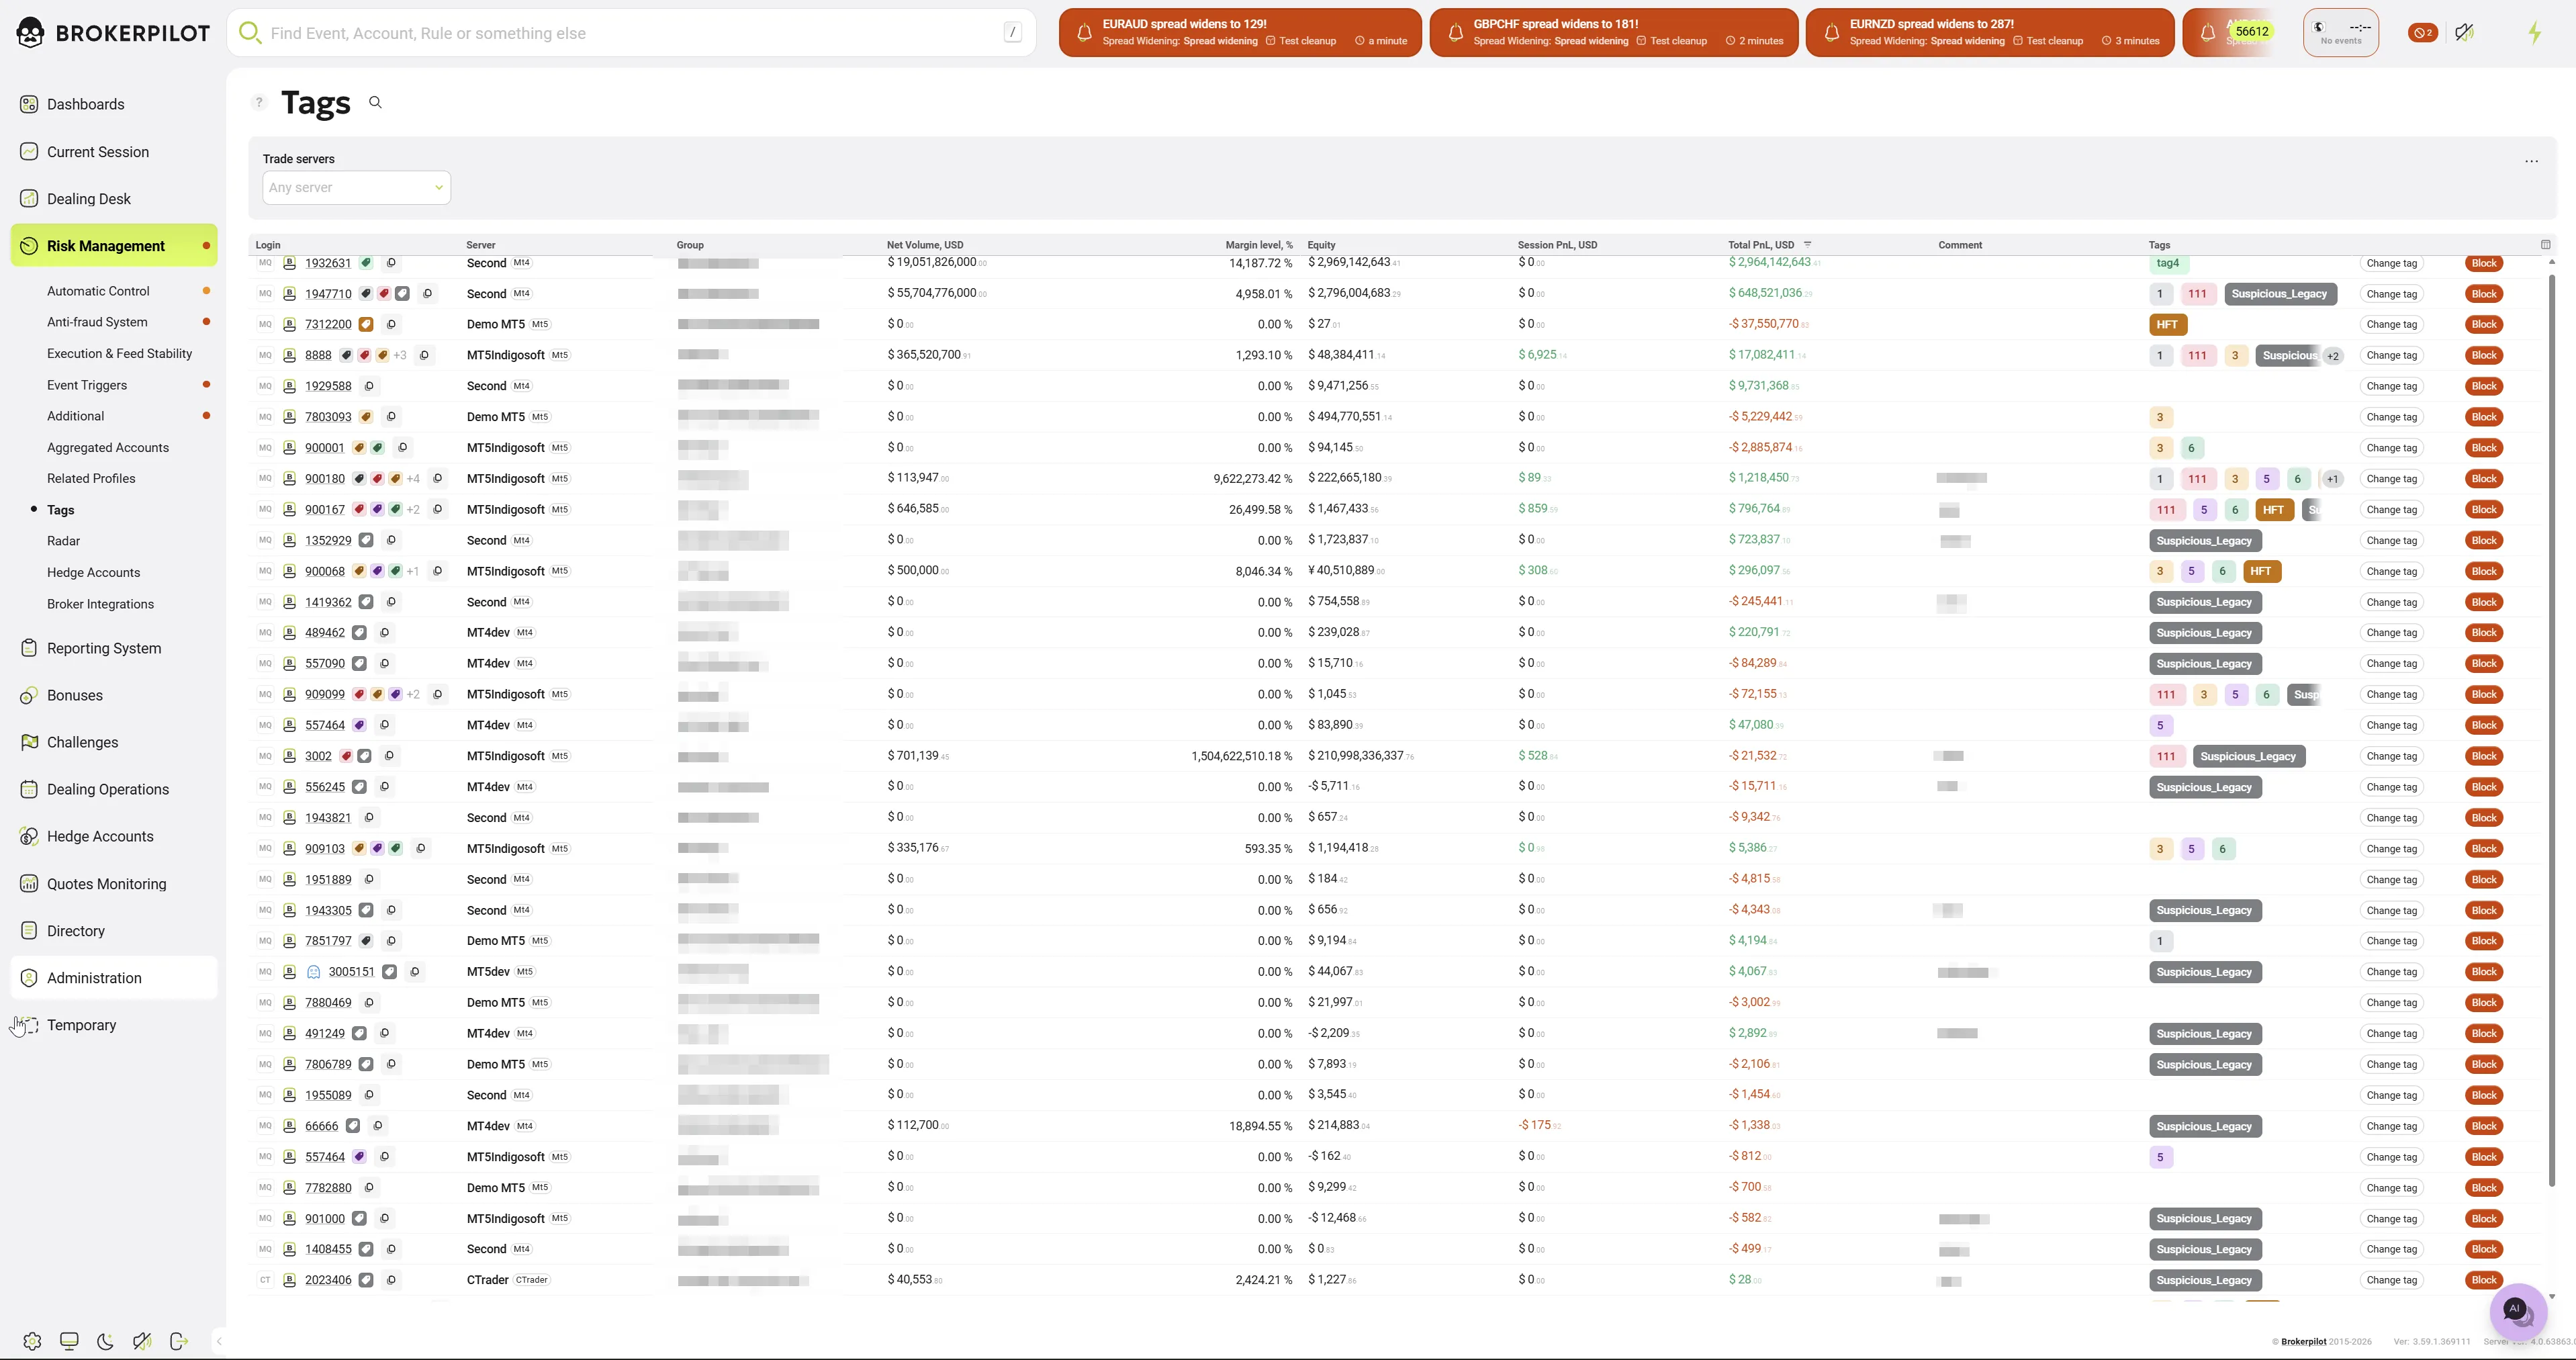
For viewing and exporting of accounts with assigned tags:
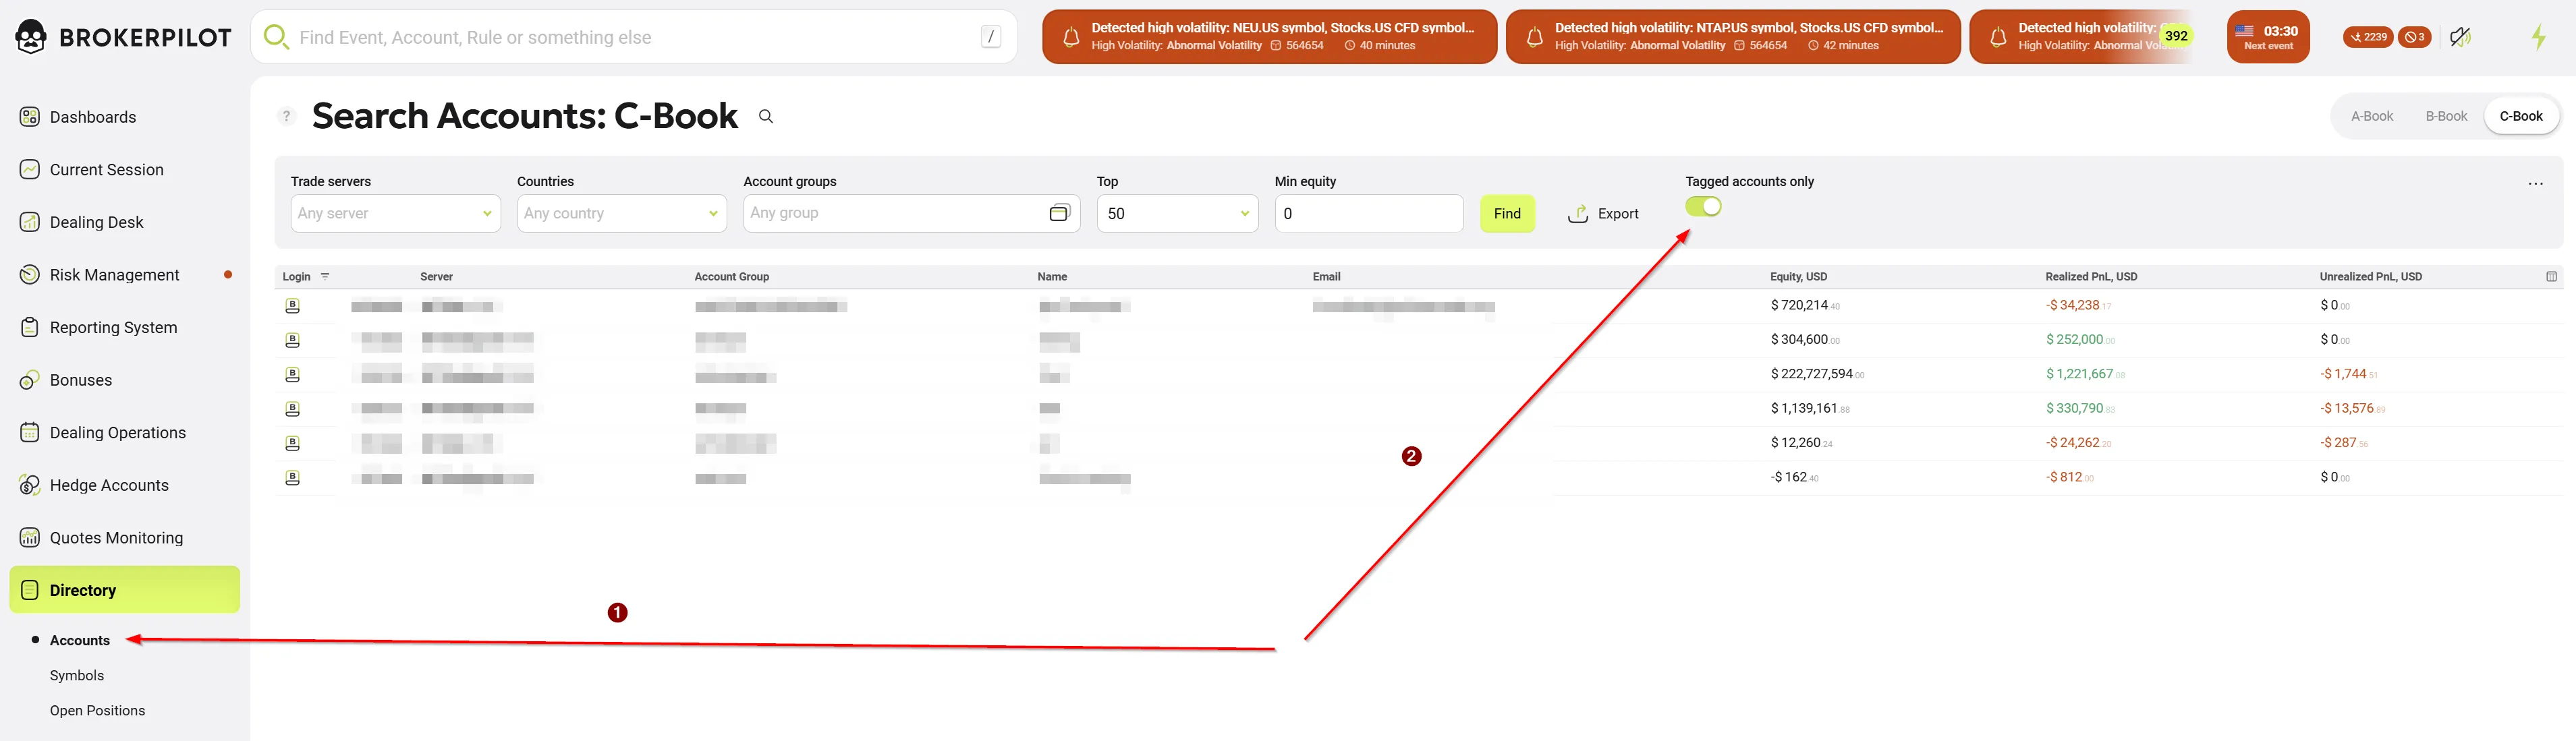
- Go to the main menu section: Directory -> Accounts.
- In the upper right part of the filter panel, find the
Tagged accounts onlytoggle. - Switch the toggle to the active (green) position.
- The table will update to show all accounts that have at least one tag assigned.
Upcoming update: In the current version, the filter displays all tagged accounts. The ability to filter the table by a specific tag (e.g., to show only accounts with the "Arbitrage" tag) is currently under development and will be added in the very near future.