How to Work with Notifications
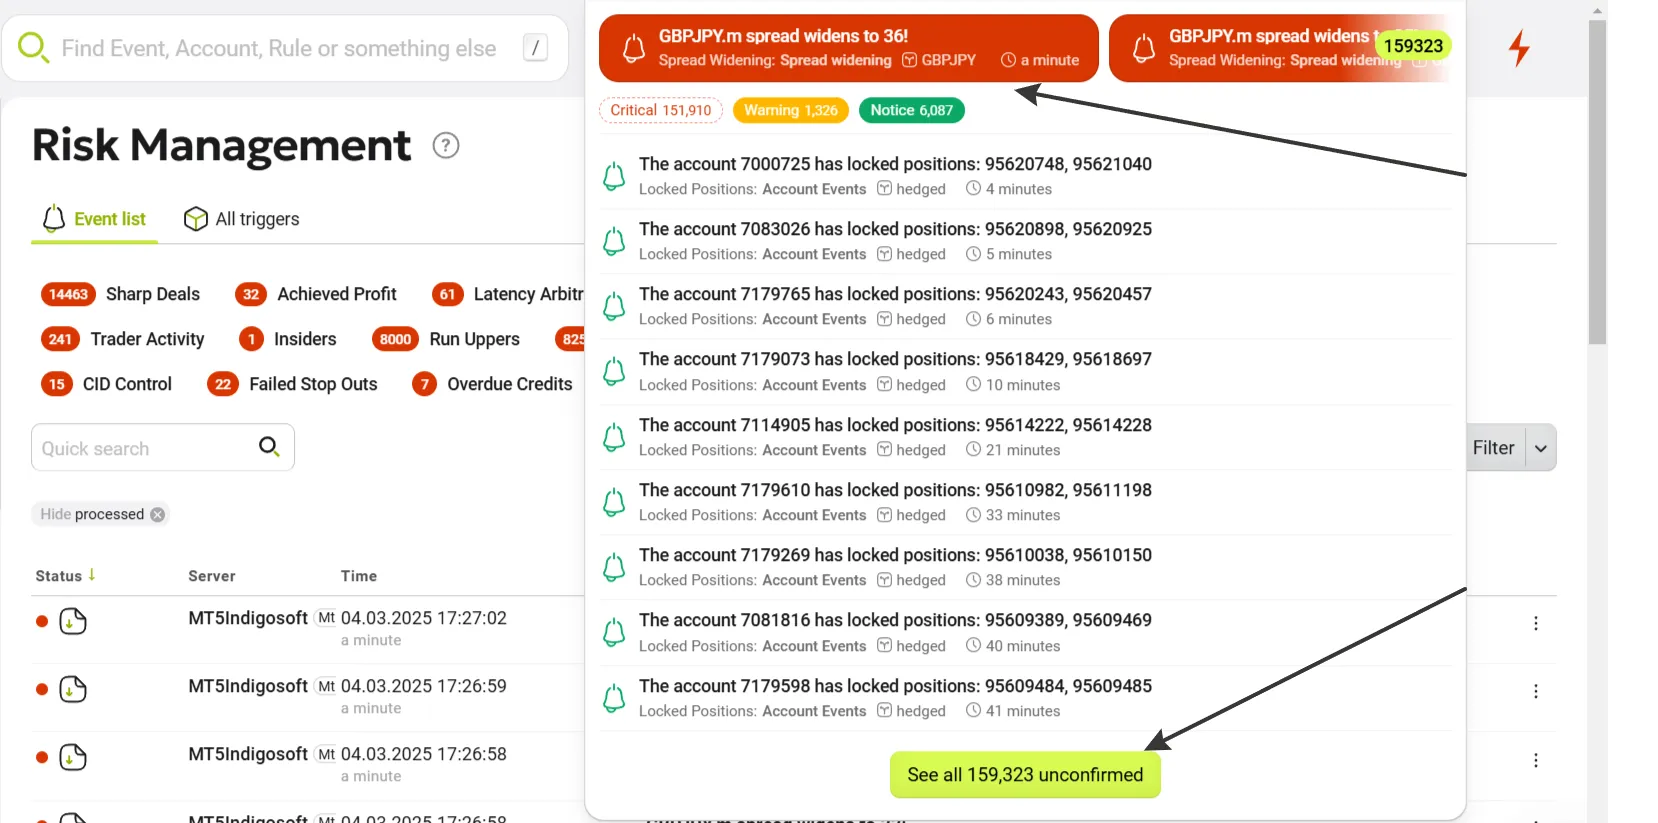
All notifications from the triggers are displayed in the top right corner of the screen. You can view all of them by pressing the “See all” button or switch between their levels of disturbance by sorting them.
Processing of the Notifications
The notification processing workflow in Brokerpilot allows users to review, analyze, and take action on detected events generated by system triggers.
Accessing Notifications
By clicking on the notification panel at the top, the user can start processing it. The following options are available.
The Accept Button: You are confident that the trading of this account is transparent, and you accept the event. The notification is considered processed and vanishes from the notification stream.
The Suspicious Button: Marks the account with a flag, which will be displayed in the "Suspicious" page in the Risk Management section of the menu. You can add your comment to the flag to quickly identify the account in various reports.
The Exclude Account Button: Excludes the account from the trigger checklist.
The Block Trading Button: Blocks trading (the account can log in but cannot trade; becomes read-only).
To process multiple notifications at once, hold the Ctrl key and click each desired notification. A control panel will appear, allowing you to take action on all selected items simultaneously.
Notification History
The history of notifications is available by pressing "Risk Management" in the left-side menu (1).
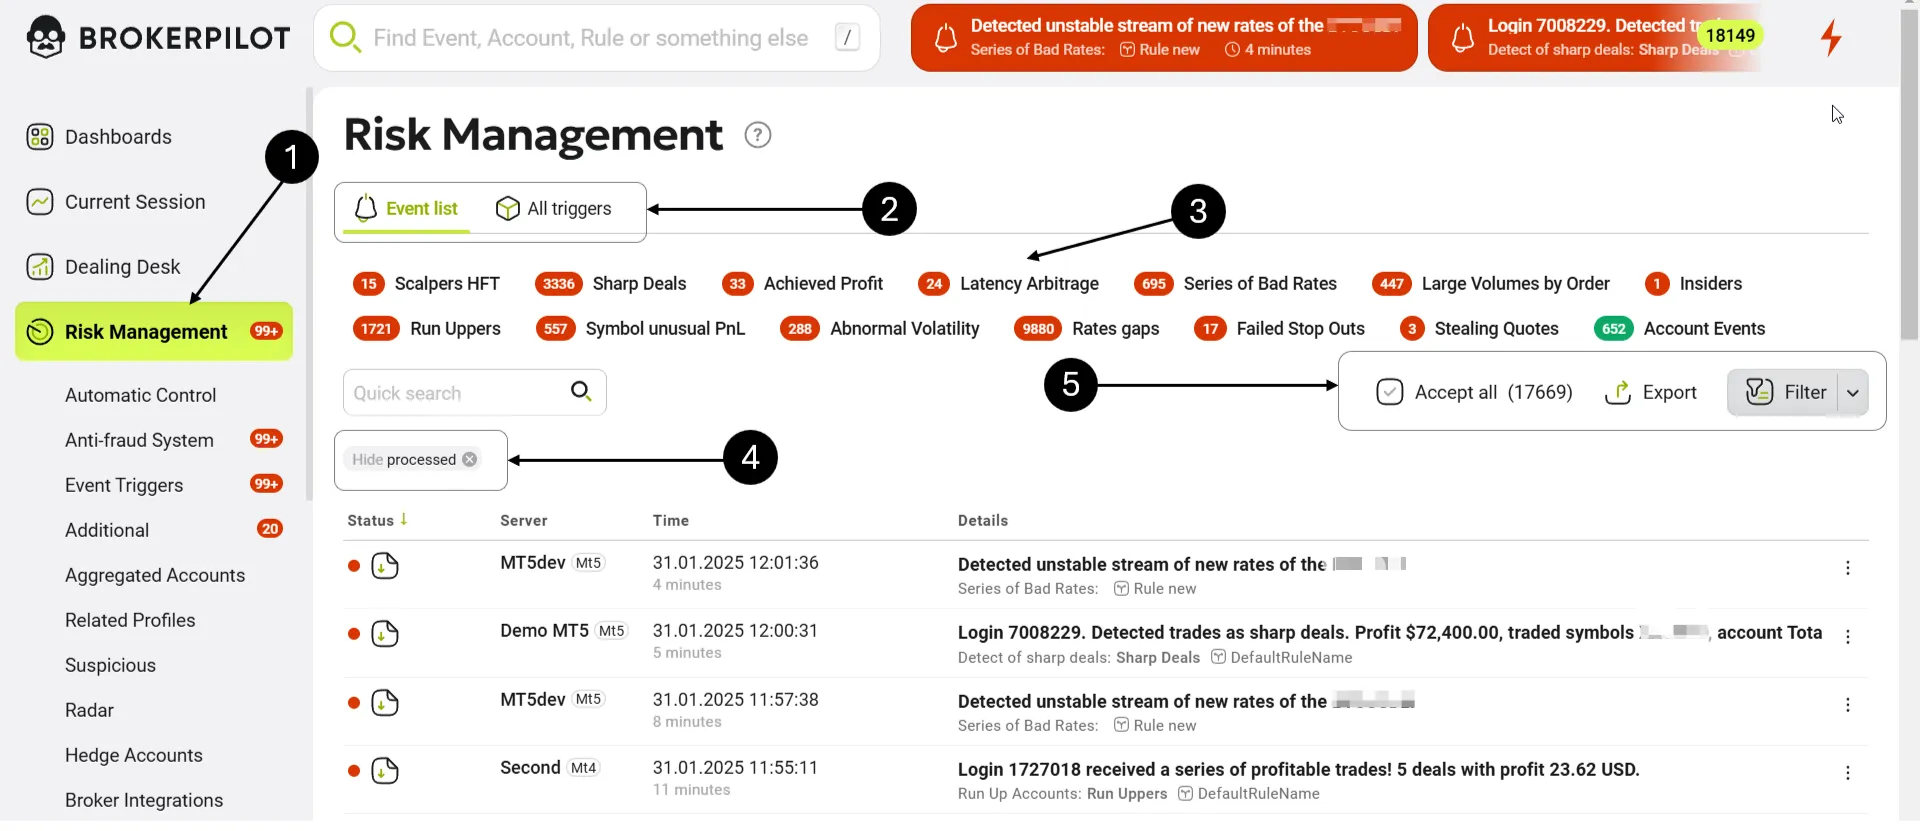
You can switch between two sections: the “Event List” (unprocessed notifications) and the “All Triggers” (unprocessed notifications divided by the name of triggers).
You can choose notifications for a specific trigger by pressing the name of the trigger (3). To see all processed notifications, click the “Hide Processed” button (4). By pressing “Accept It All”, you accept all unprocessed notifications (5). Here, you are also able to export this data to Excel.
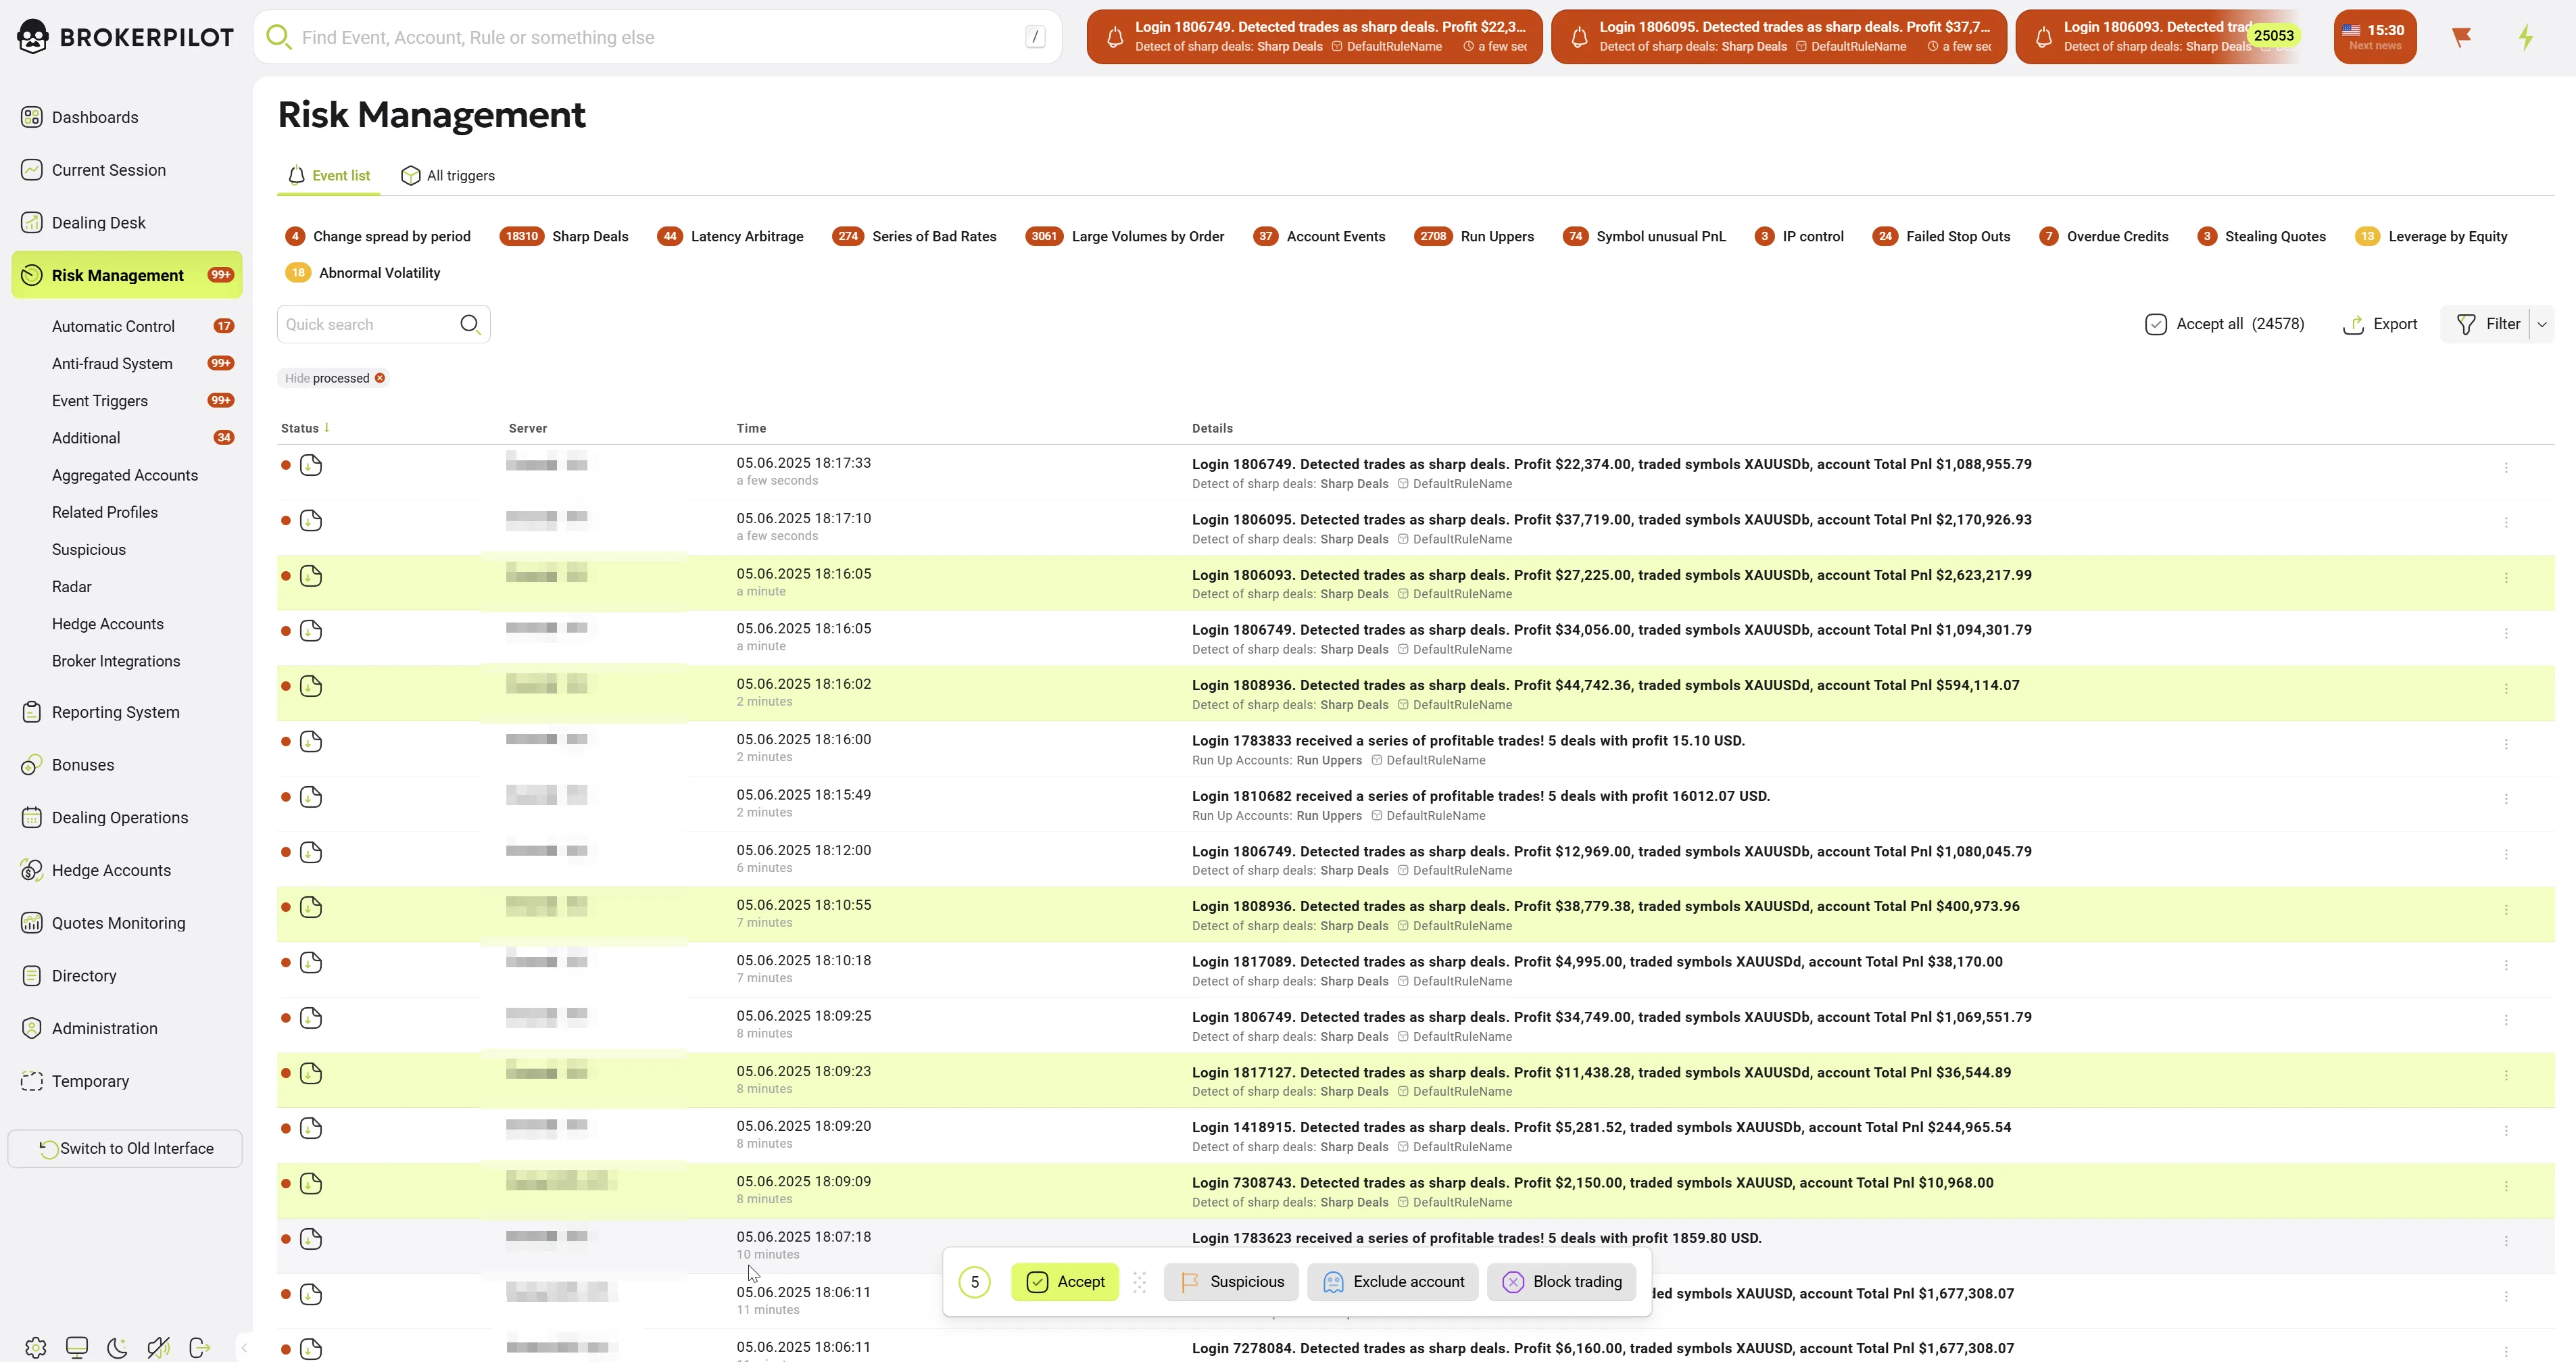
Processing Notifications Workflow
- Navigate to the relevant section (e.g. Risk Management, Anti-fraud System).
- Select a trigger name (for example, Sharp Deals).
- The system opens a list of notifications generated by the selected trigger.
Each row in the list represents a single detected event and contains:
- Status indicator
- Trading server / platform
- Event timestamp
- Short description of the detected issue
The list is typically sorted in reverse chronological order, with the most recent events displayed first.
Opening a Notification
- Clicking on a notification row opens the event details in a right-side sliding panel (drawer).
- The main list remains visible, allowing quick navigation between events.
- Clicking the arrow icon in the top-right corner of the notification opens a new browser page containing the relevant information about the event.
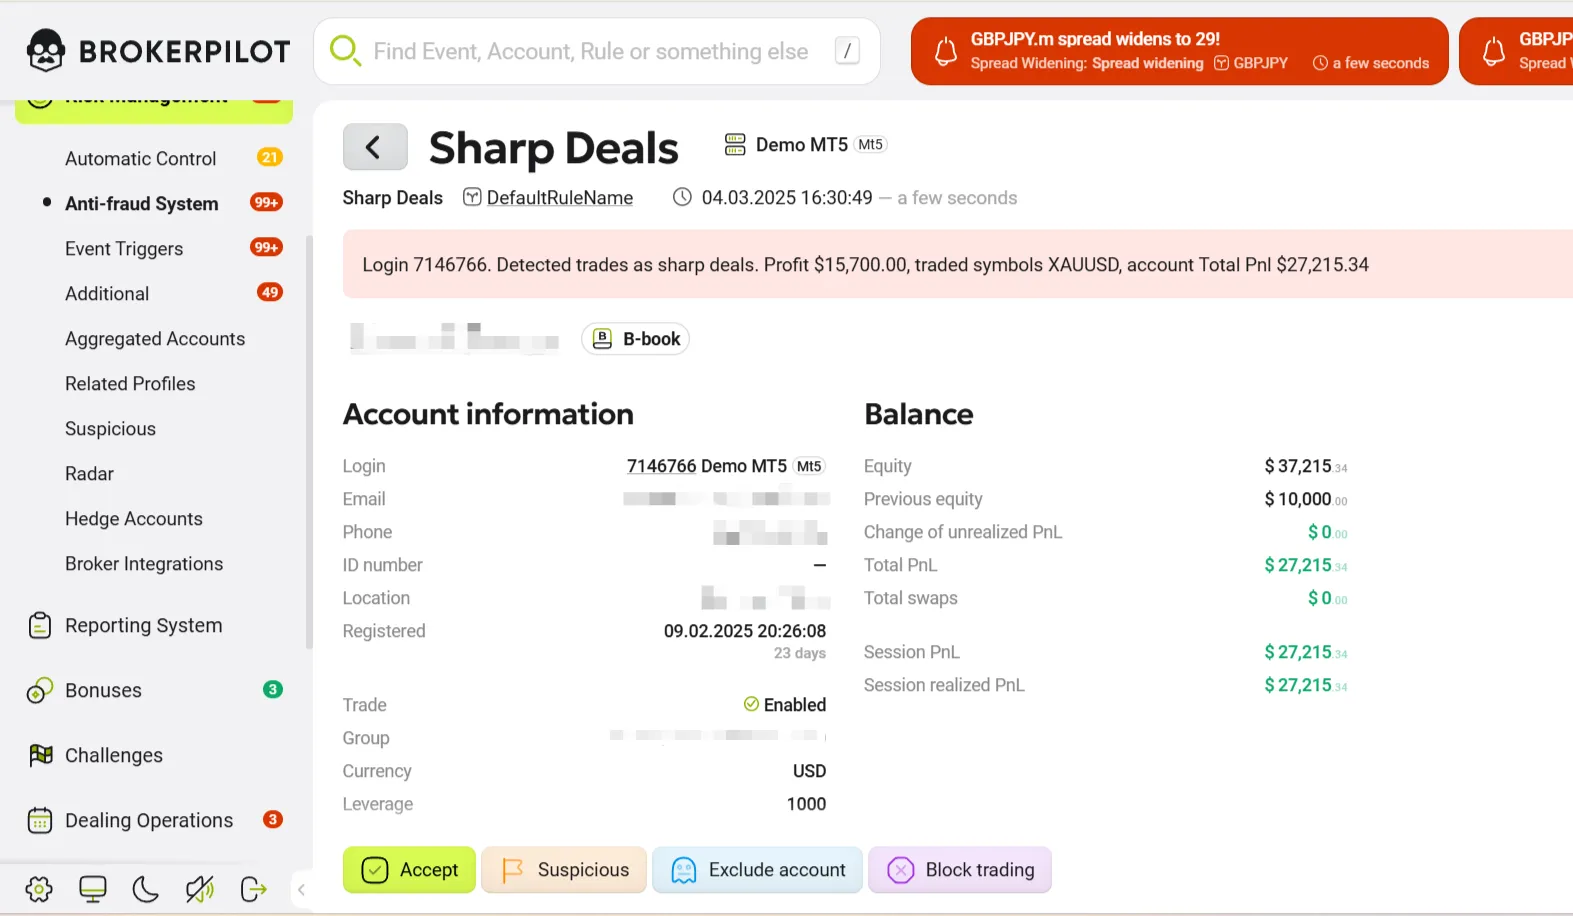
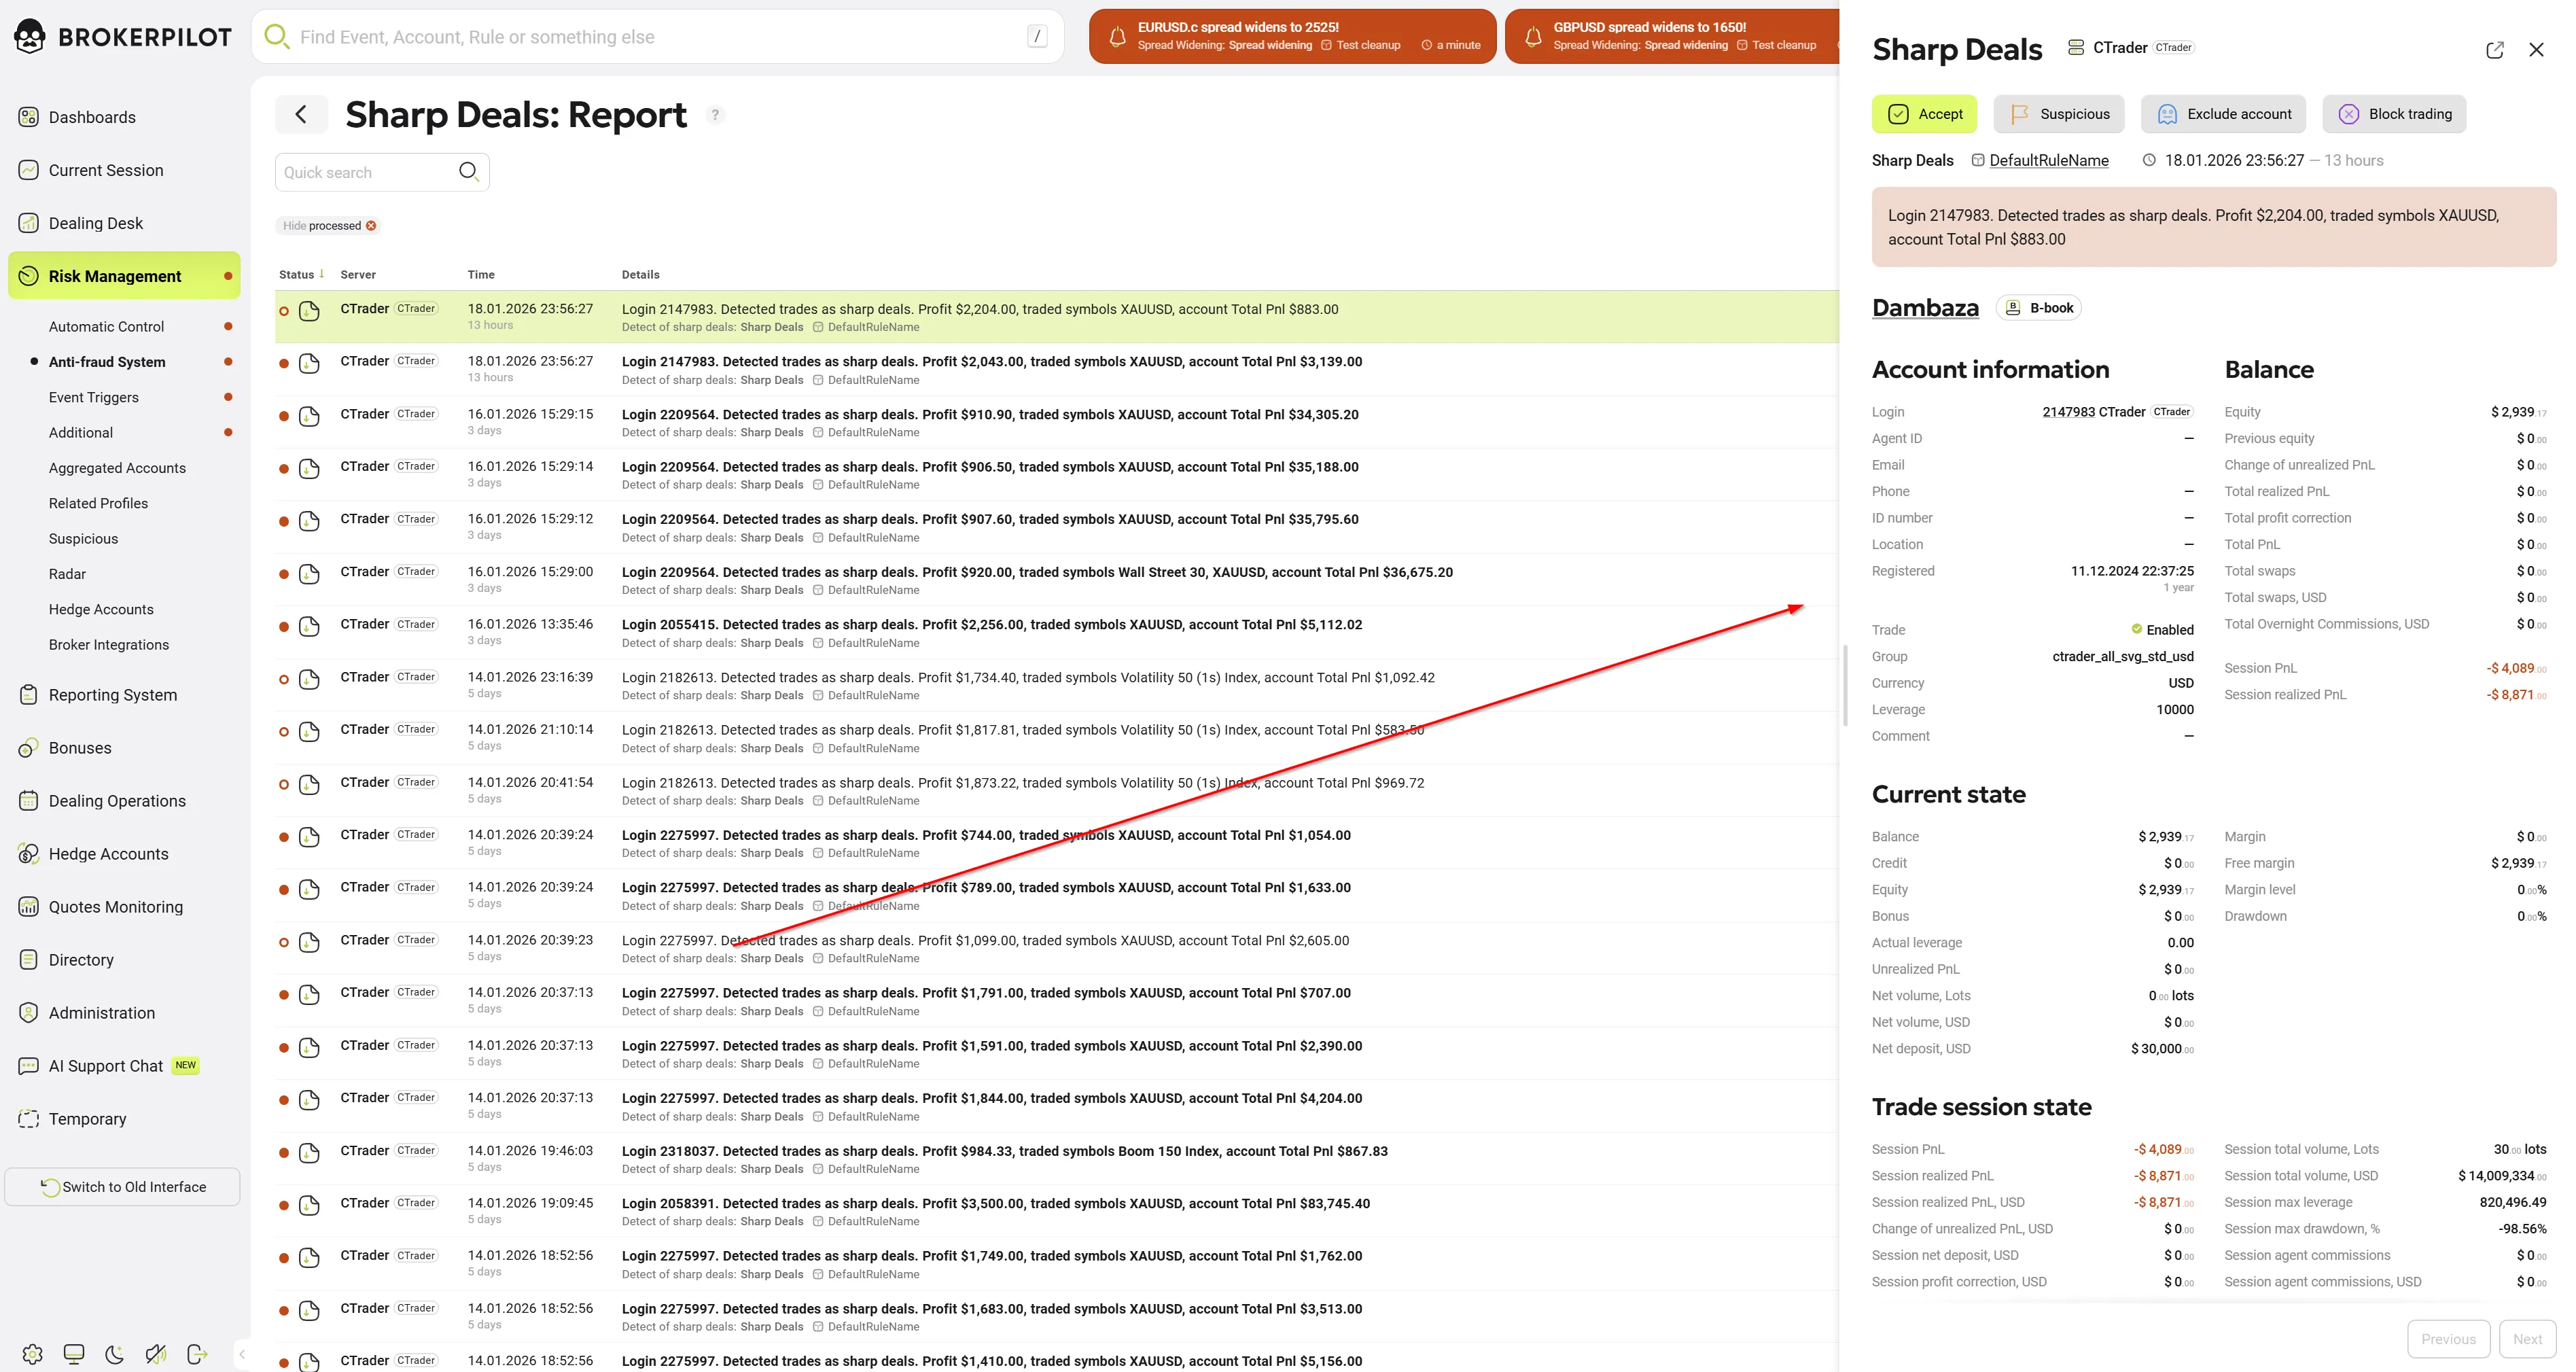
Notification Drawer
The notification drawer contains all information required for decision-making and analysis.
Header Section
The header displays:
- Trigger name
- Rule name
- Event timestamp
- Event duration
- Account / book type (e.g. A-Book or B-Book)
Action Buttons
At the top of the drawer, action buttons are available for processing the notification, such as:
- Accept – Confirm and acknowledge the event
- Suspicious – Mark the account or activity as suspicious
- Exclude account – Exclude the account from further trigger checks
- Block trading – Restrict trading for the account
The available actions depend on the trigger type and user permissions.