Configuration of servers, exclusions, and clusters
1. Server Configuration
You can configure real and demo servers using these settings. This helps you differentiate the vital metrics of the Current Session and fine-tune existing tools of the Risk Management system.
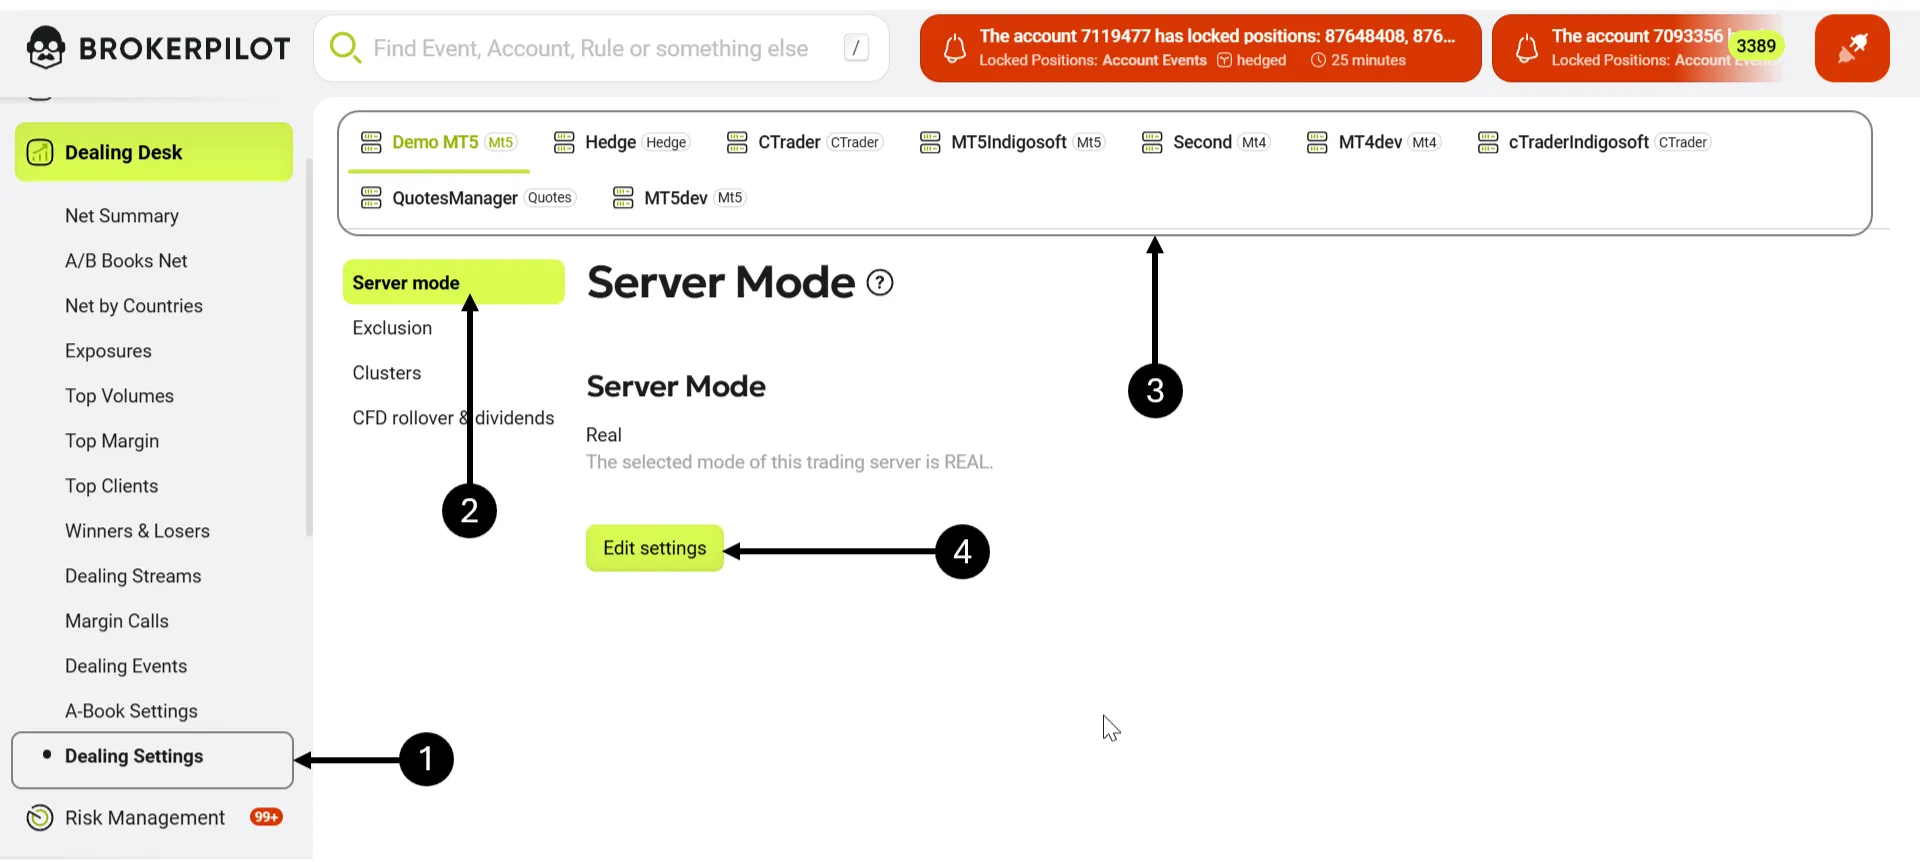
Step 1 – Navigate to Dealing Desk – Dealing Settings on the left-side menu.
Step 2 – Select Server Mode in the internal menu.
Step 3 – Click on the server at the top of the list on the screen. It will be highlighted.
Step 4 – Press the Edit Settings button.
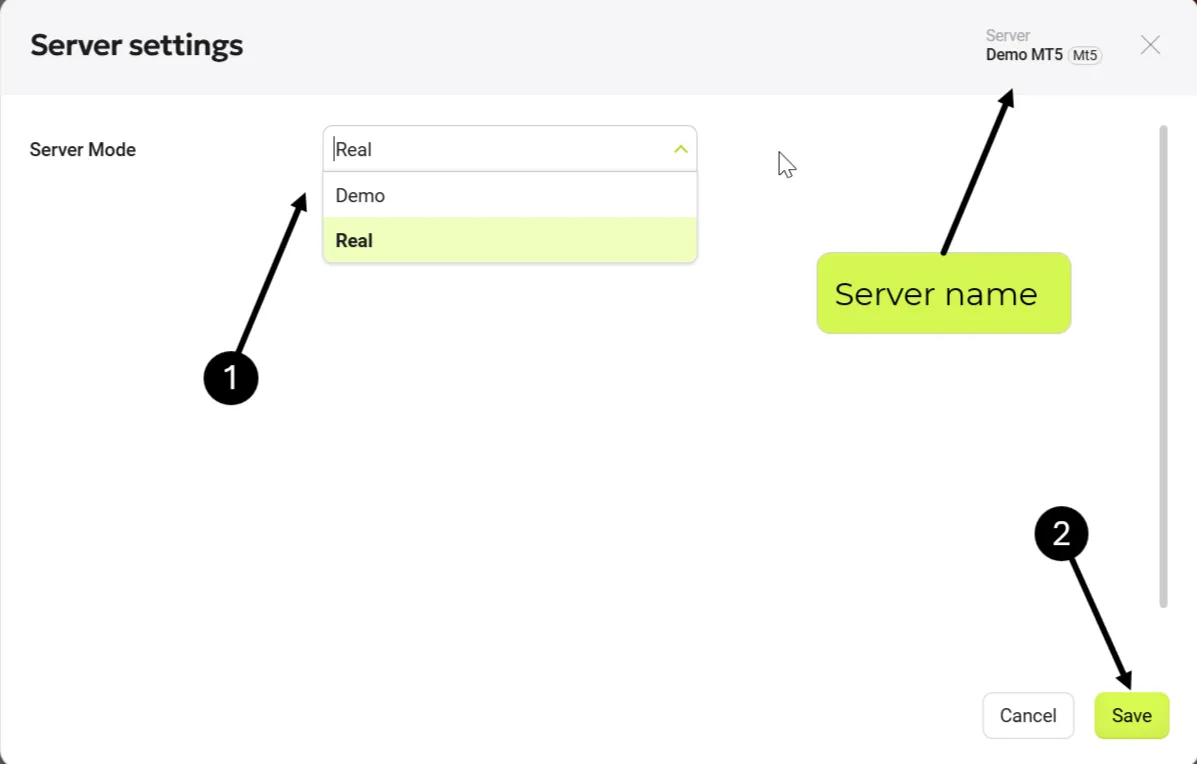
Verify the correct server name, define if the server is Real or Demo, and then save the settings. After that, perform the procedure on all servers.
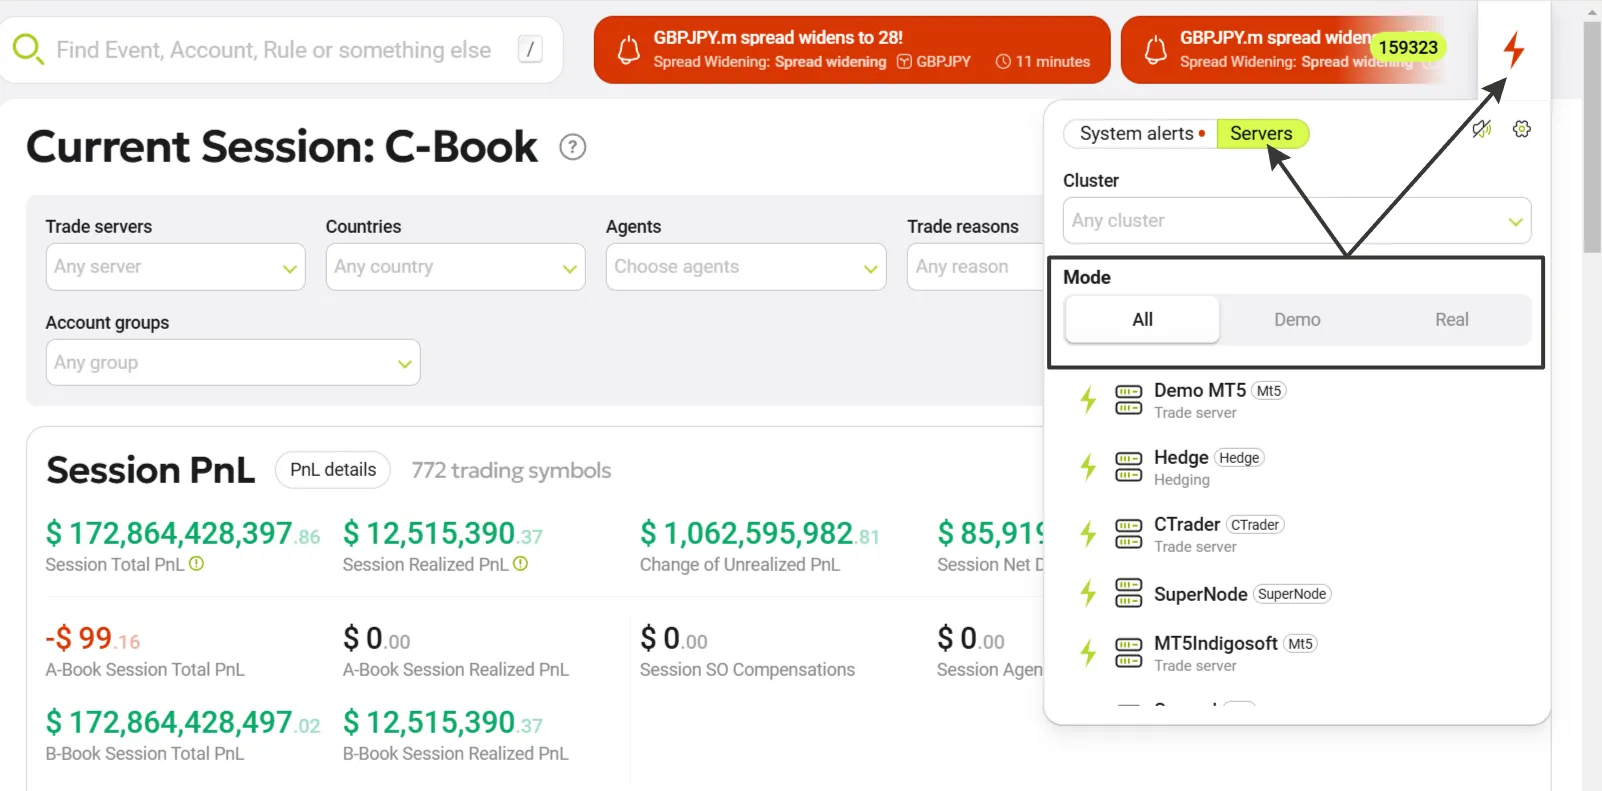
Click the lightning icon in the top-right corner of the screen and switch between the Real, Demo, and All sections to see the results of the settings.
2. Exclusion Configuration
You can define a list of exclusions for symbol groups, account groups, and individual accounts for each server. These will be excluded from all calculations results for a specific server. If needed, you can easily return them to the calculations later.
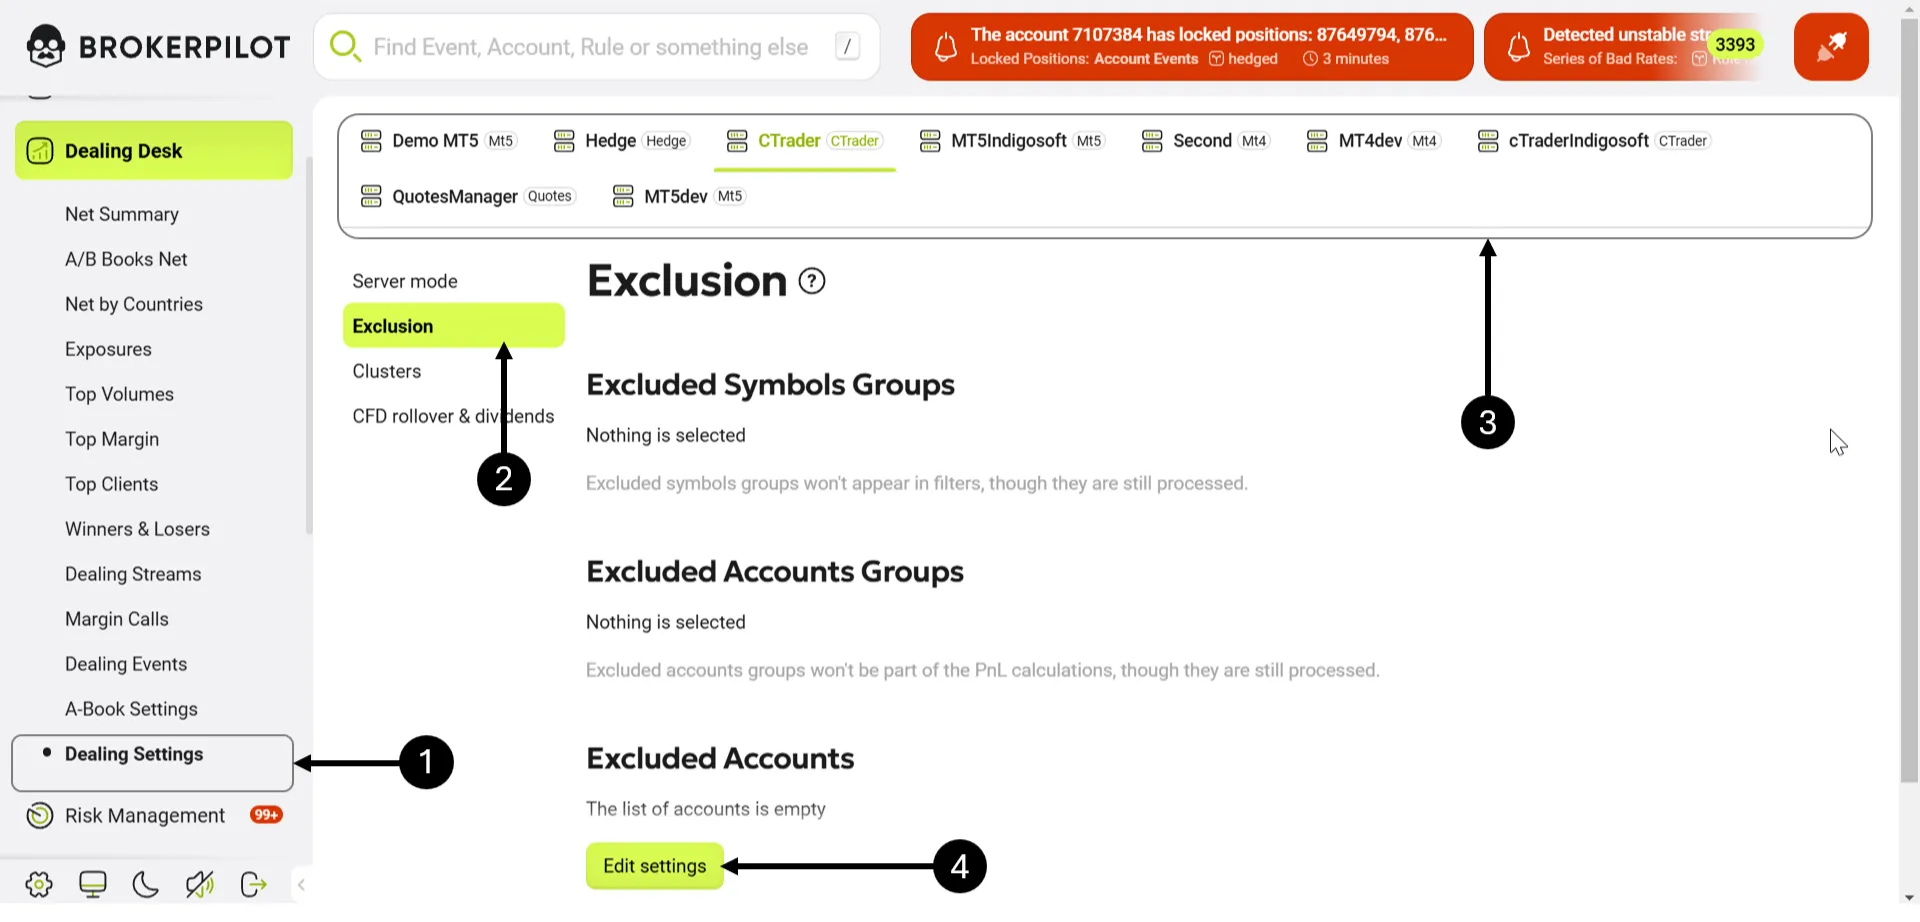
Step 1 – Navigate to Dealing Desk – Dealing Settings on the left-side menu.
Step 2 – Select Exclusion in the internal menu.
Step 3 – Choose the server at the top of the list on the screen. It will be highlighted.
Step 4 – Press the Edit Settings button.
Select Edit list for Symbol Groups or Accounts Group to manage exclusions in the opened window. Check the necessary groups and click Update in the new window.
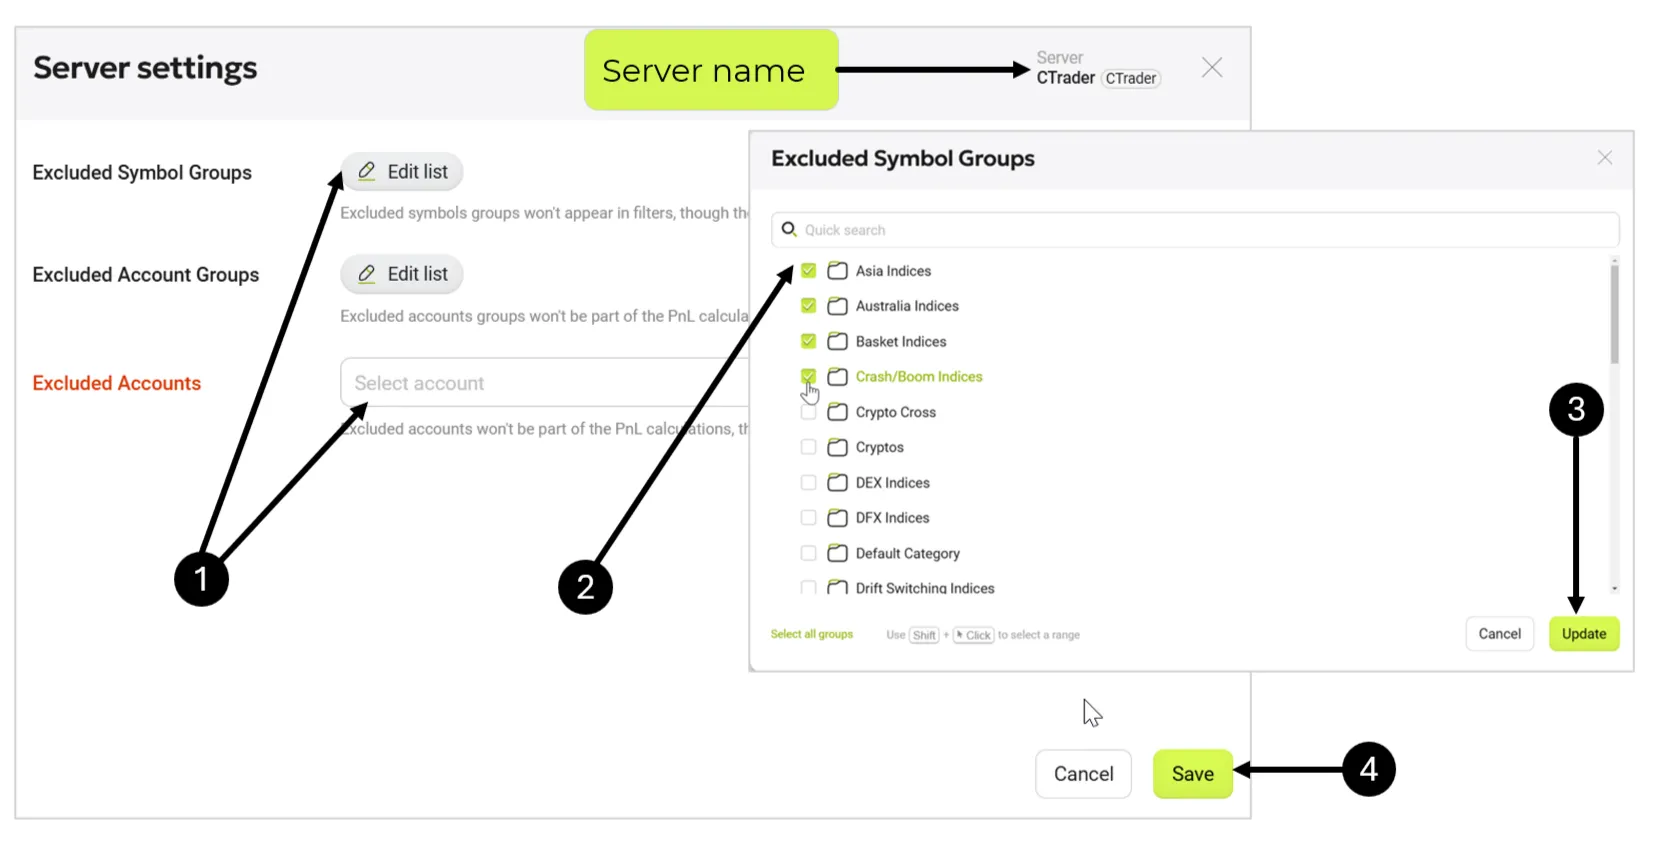
If you want to add individual accounts, place them in the Excluded Accounts field. Press the Save button in both cases.
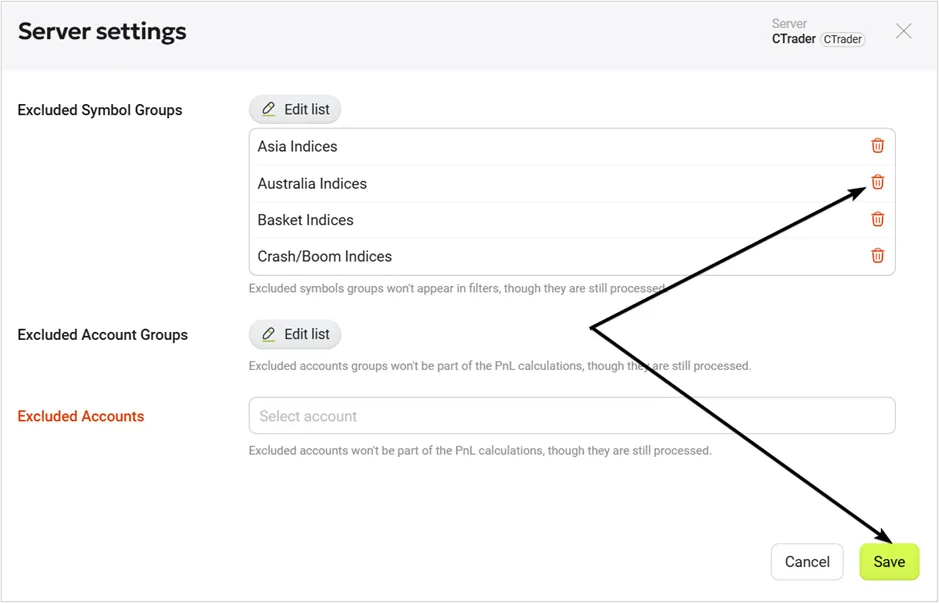
Navigate to Dealing Desk – Dealing Settings, then choose Exclusion – Edit settings to remove exclusions. After that, save the changes.
3. Clusters Configuration
Clusters are groups of servers combined for a specific purpose, such as dividing the visibility of servers among different departments within the company. The responsibility for creating clusters lies with the administrator of the Brokerpilot website on the broker's side.
Step 1 – Choose Dealing Desk – Dealing Settings on the left-side menu.
Step 2 – Select Clusters in the internal menu.
Step 3 – Choose the server at the top of the list on the screen. It will be highlighted.
Step 4 – Press the Edit Settings button.
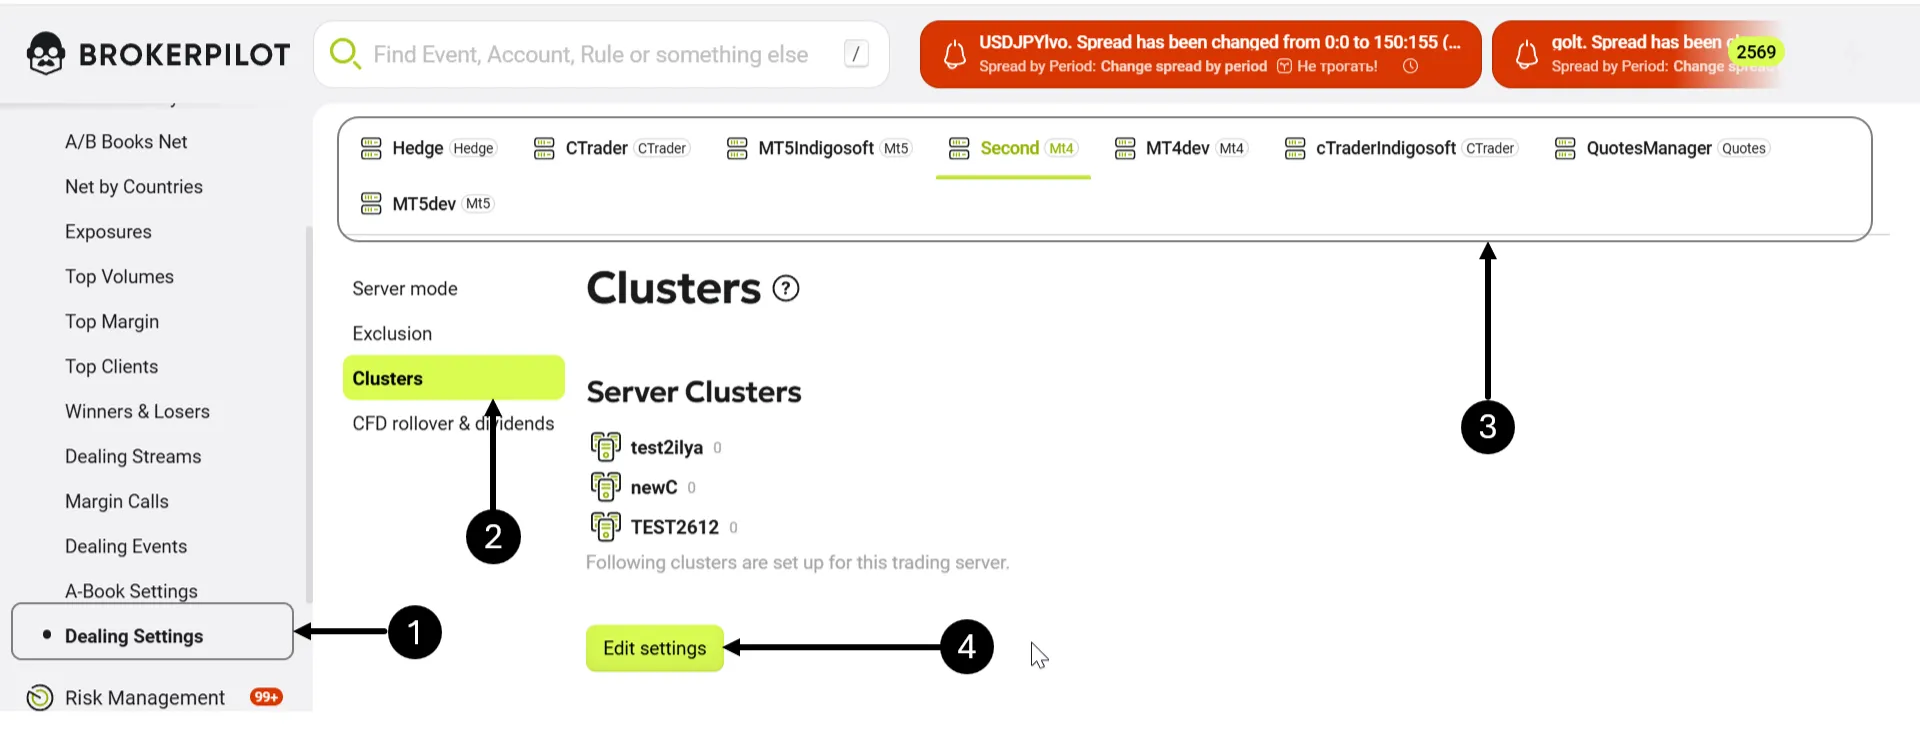
Step 5 – In the opened window, you can create a new cluster by assigning it a name and adding the necessary servers.
Step 6 – To add servers to a cluster, select them from the list of available servers and click Add to Cluster.
Step 7 – After configuring the cluster,